My van is now for sale, 35,000$, contact me for any info.
The current engine is a 2009 with 4000 miles
  |
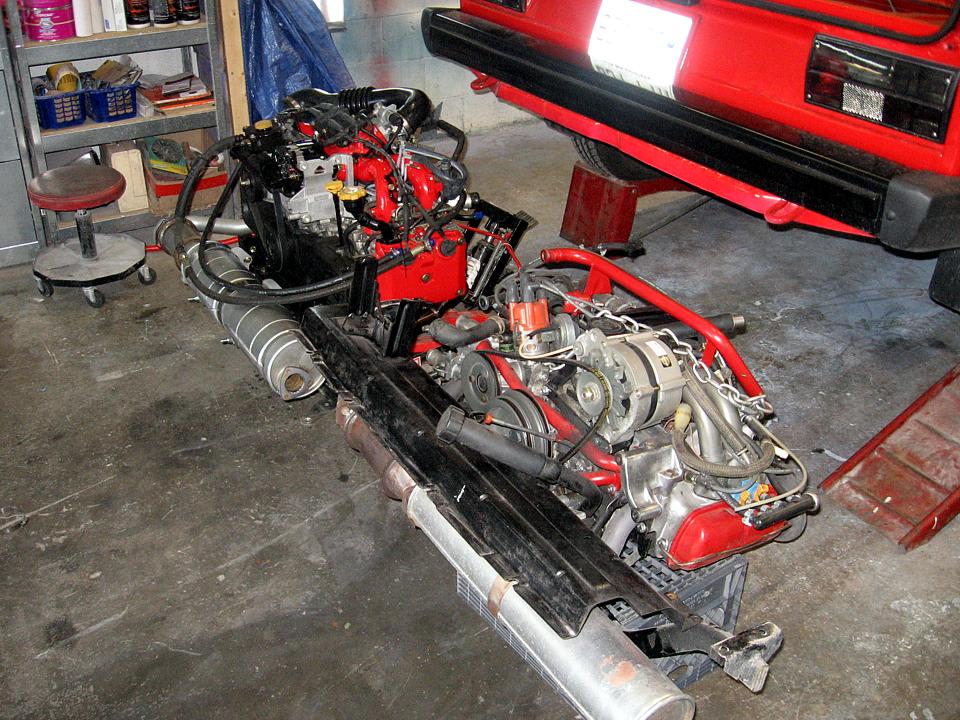
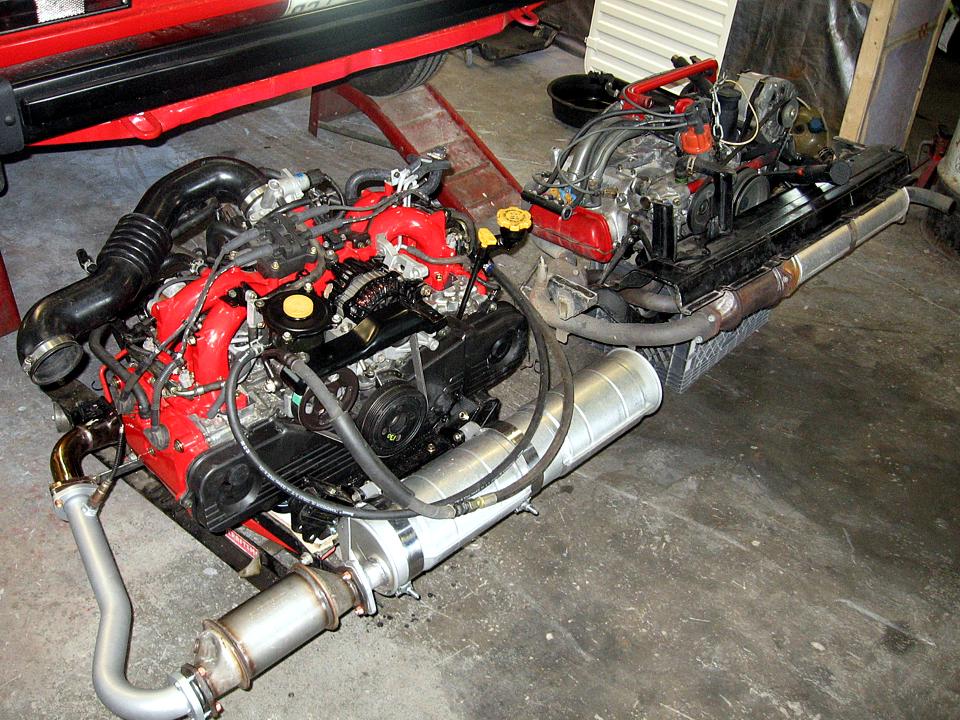
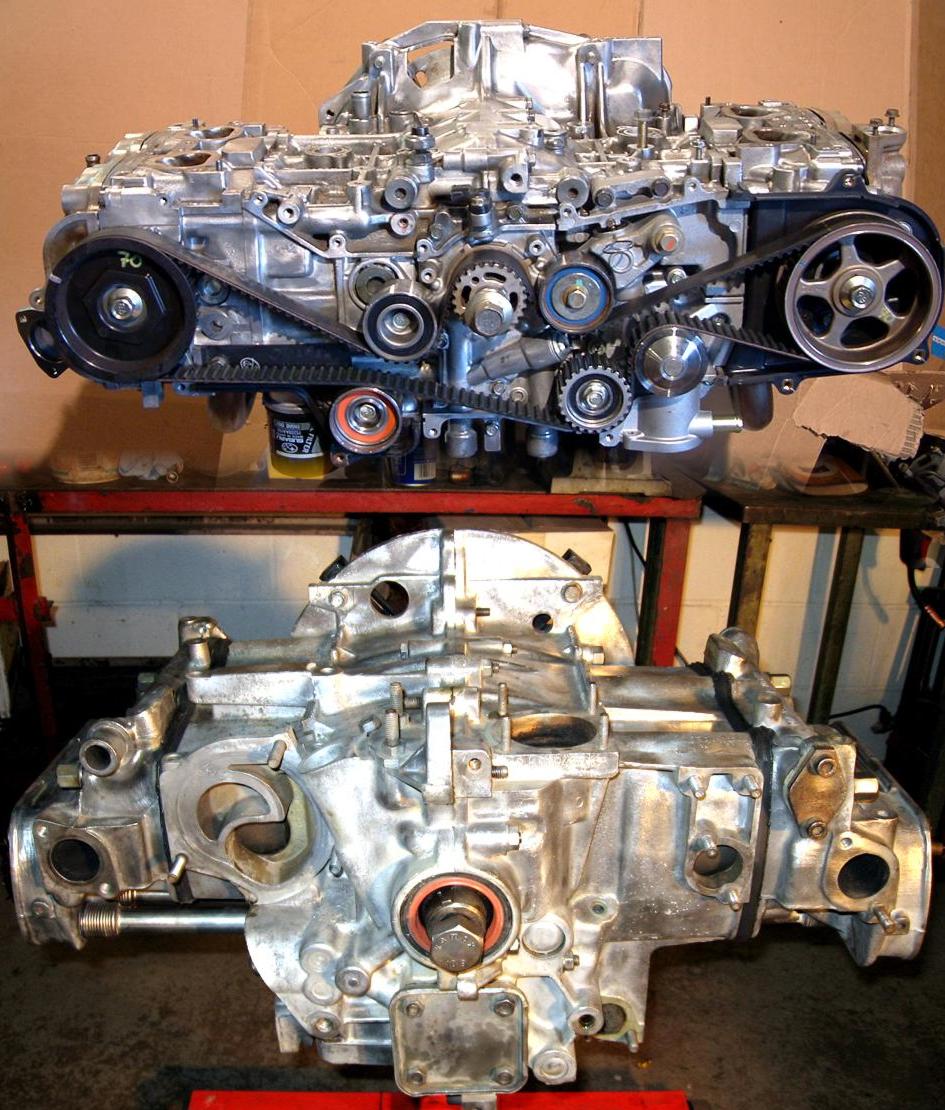 Voici une photo intéressante, deux compagnies, deux moteurs de type Boxer, 20 ans de différence technologique./ Here is an interesting picture, 2 companies, 2 boxer type engine, 20 years of technological difference. |
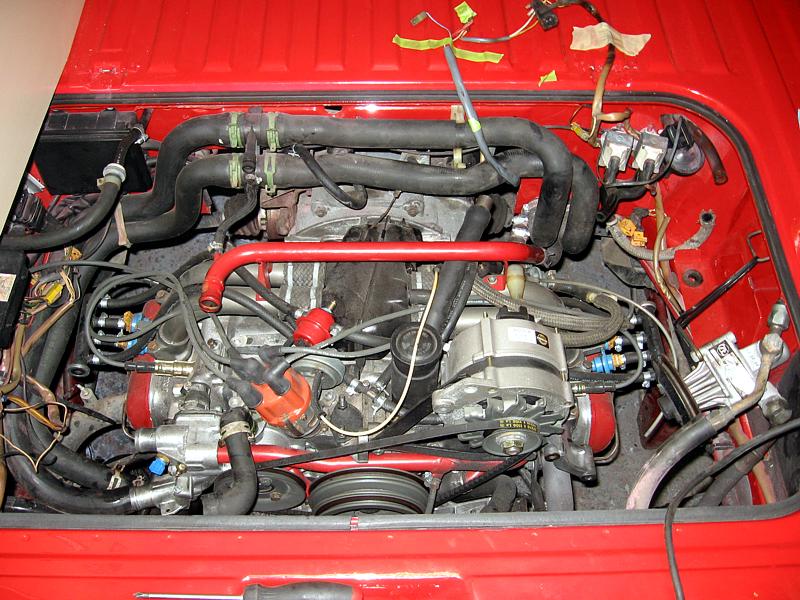
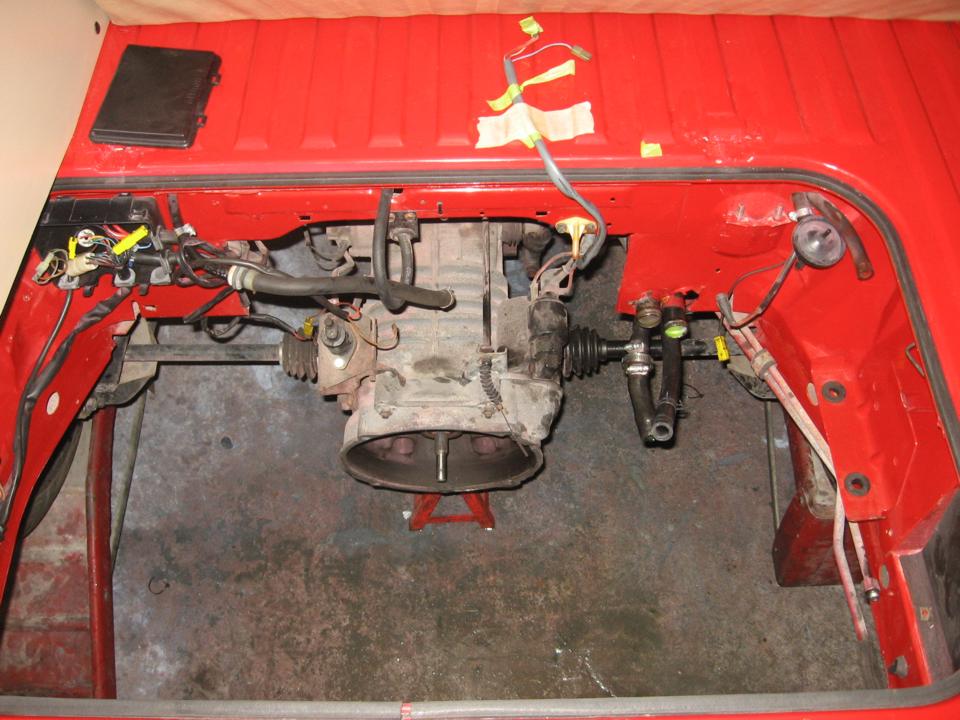
The removal and preparation

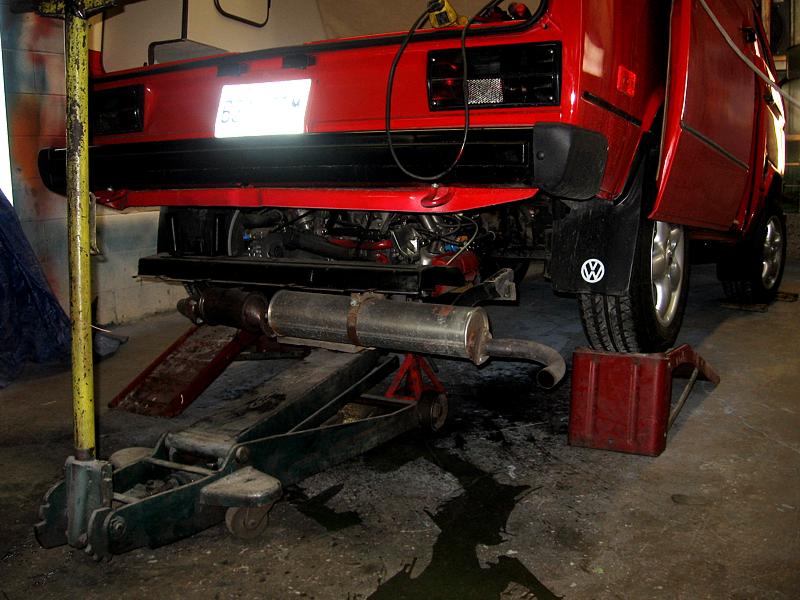


Tout doit être enlevé, à part les fils de lumières arrières.
Everything is removed, for the exception of the rear light harnes
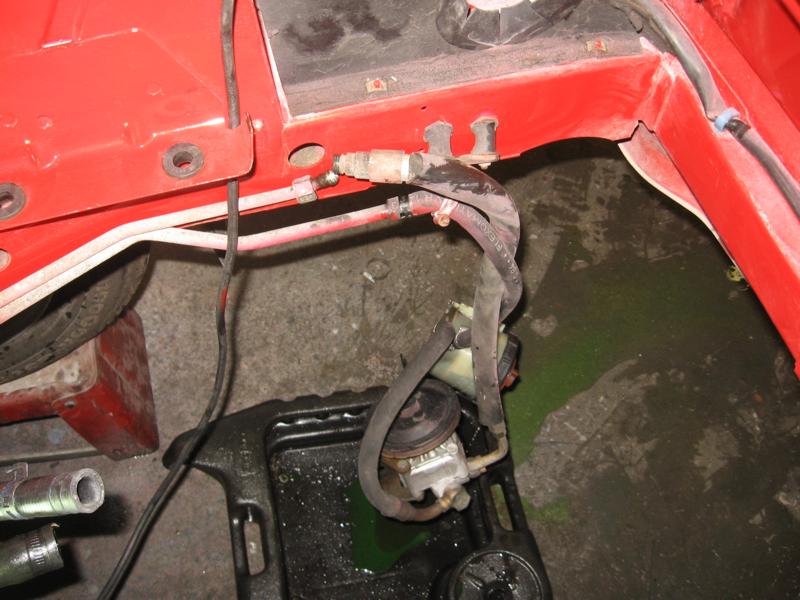
Même la pompe de la direction assistée.
Even the PS pump ass. is removed.
Même là, j'avais laissé trop de fils.
Even here, i had to much wires.
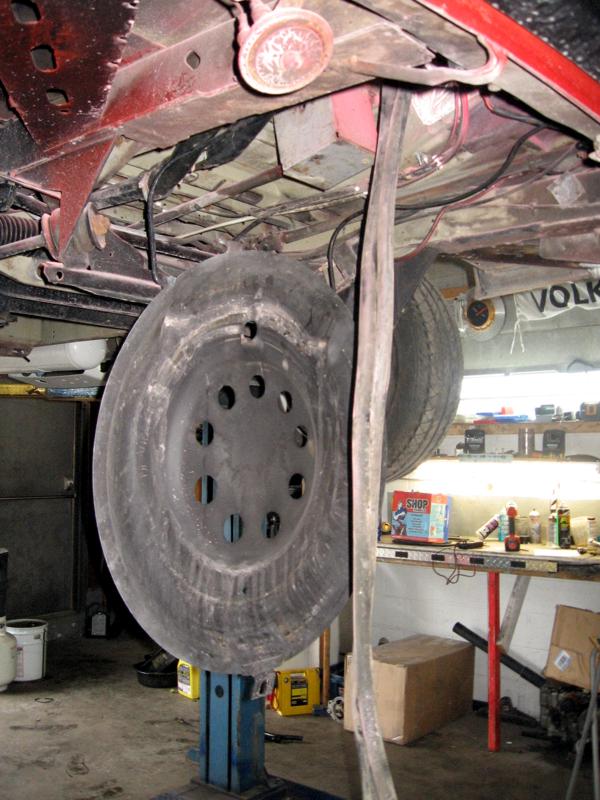

Tant qu'à refaire un véhicule, pourquoi pas un nouveau réservoir
Well, an all new van with an old tank, time for a new one.

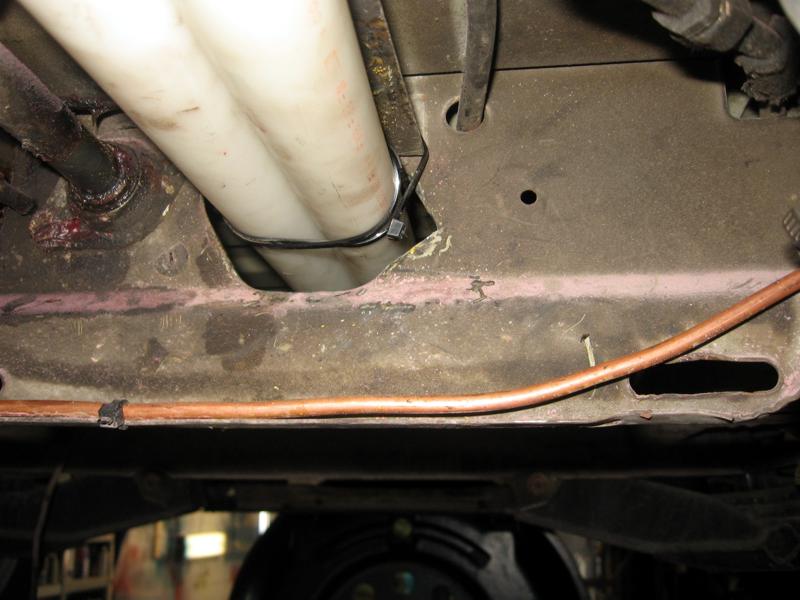
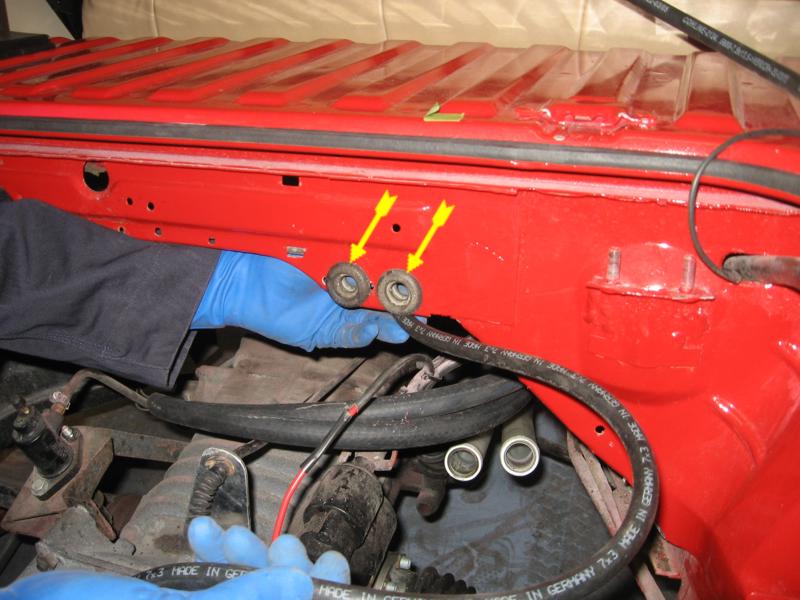
Petite modification de l'ouverture du châssis sur les véhicule 1983-1985. Il faut élargir le trou afin d'accepter les nouvelles lignes de plastique. Bien que l'utilisation des tuyaux en métal d'origine est possible, il est fortement recommandé de les changer pour ceux du Syncro en plastique. Le diamètre de ceux-ci est plus grand (meilleure circulation) et ne rouillent pas (les vôtres sont probablement déjà rouillés). Cette modification vaut autour de 400$ pour les tuyaux + 4 heures de travail. Le temps est inclus (pour l'instant...) dans le 1100$ d'installation.
A small modification as to be done on the chassis, close to the fuel tank, where the 2 main coolant lines goes, the platic line are bigger and the hole must be inlarge. The stock 1983-85 metal line can be use but it's strongly suggested that you change them for Syncro plastic line, first yours are to risky (rust) and a bit smaller in size (flow). Those new line cost about $400CAD (not included) + 4 hours of labor (included in the installation... for now!
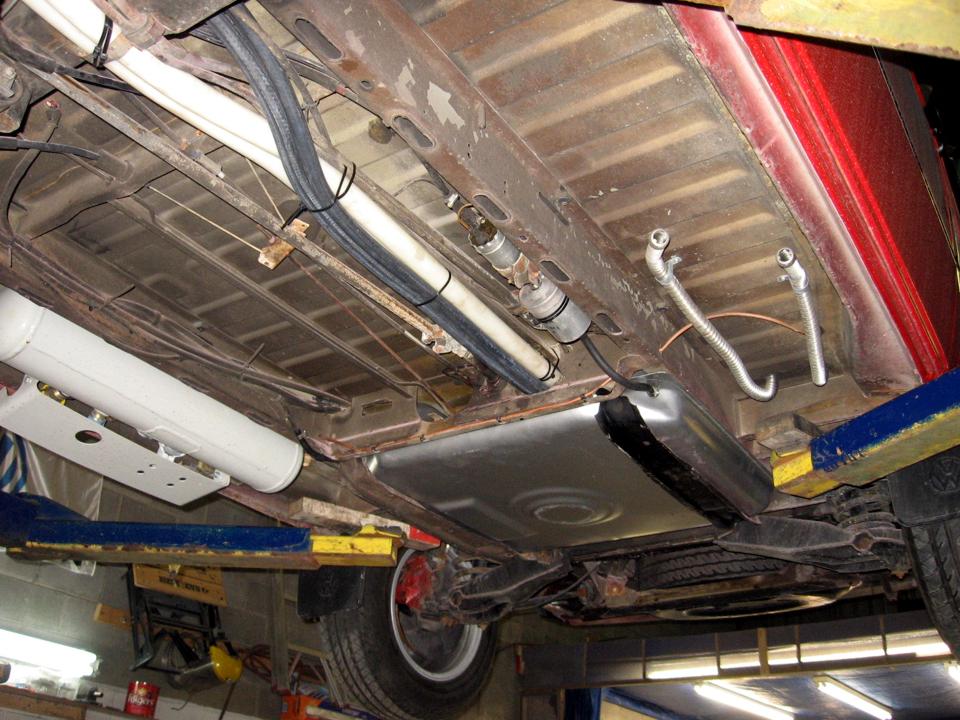
Nouveau réservoir à essence, pompe, filtre, ligne de liquide refroidissant principale, ligne de chaufferette.
New fuel tank, pump, filter, main "Syncro" coolant hoses, heater hoses

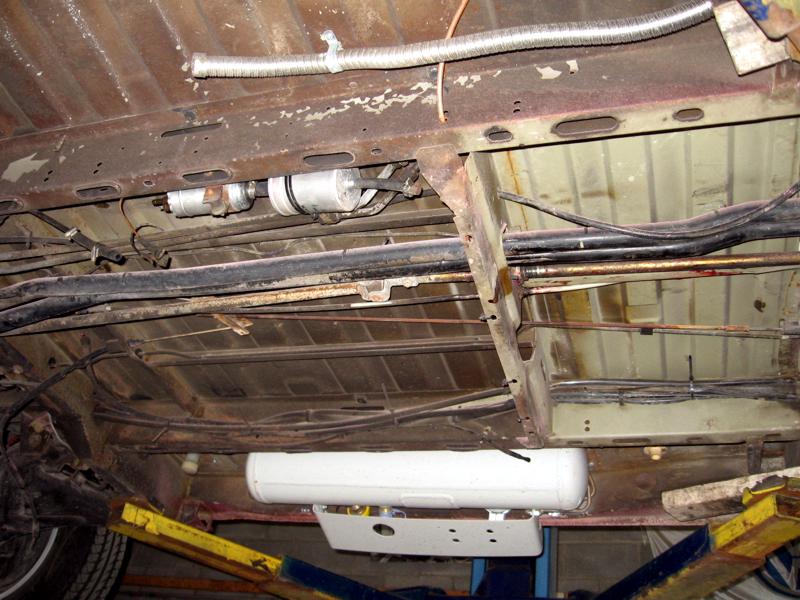
Un dessous tout neuf
An all new underneath
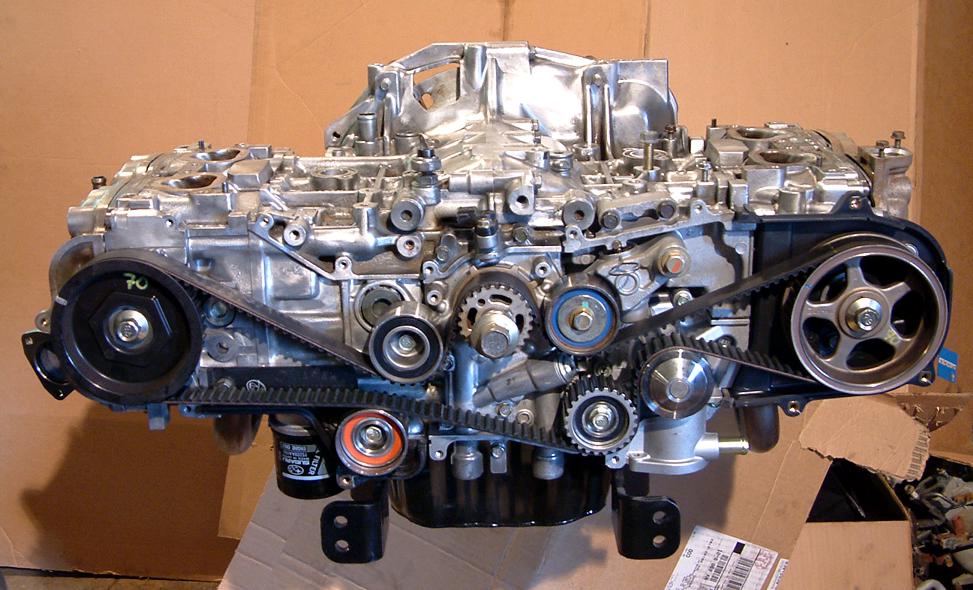
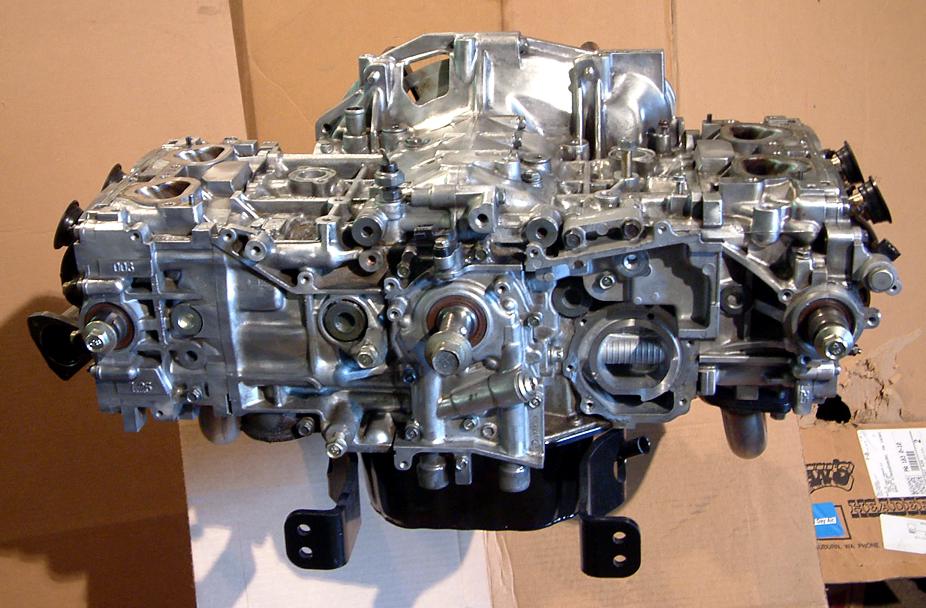
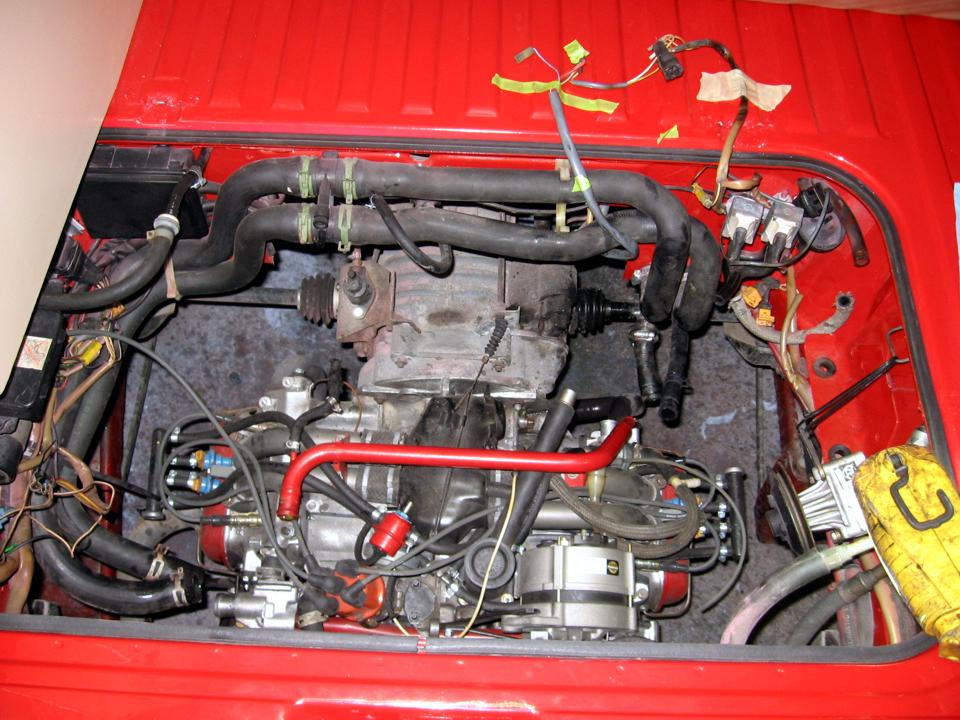
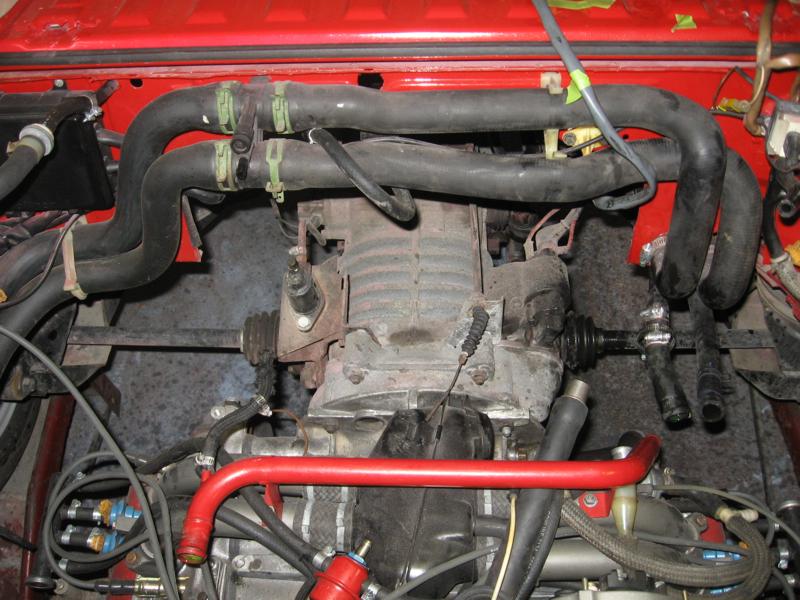
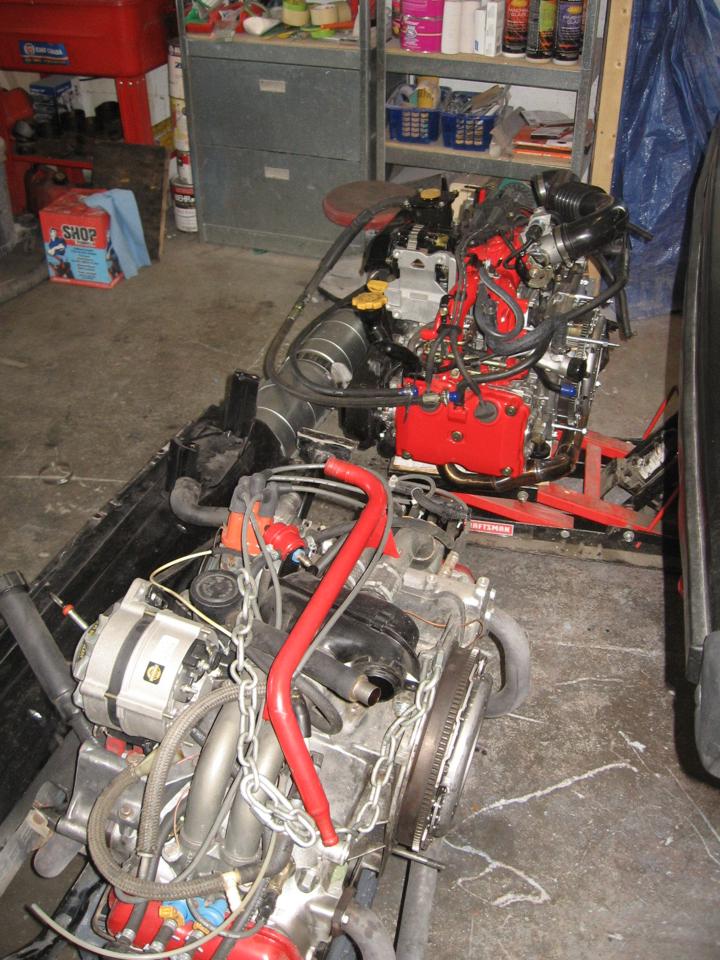
The Subaru/Vanaru engine
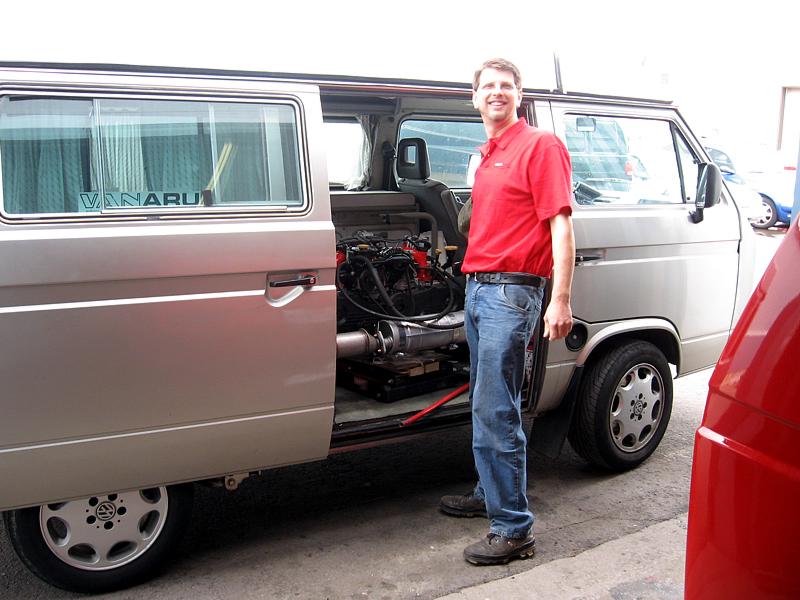
Hans de Vanaru, son rêve, un beau rêve, transformer un véhicule déjà formidable en un véhicule parfait.
Hans from Vanaru... yea, his dream, a great dream, to make a amazing camper van just better....
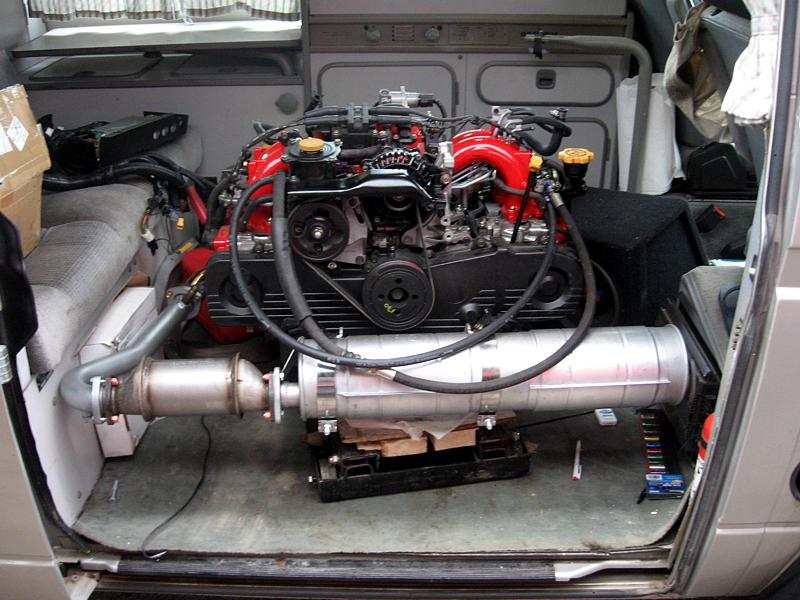
Pas de commentaires
No comments

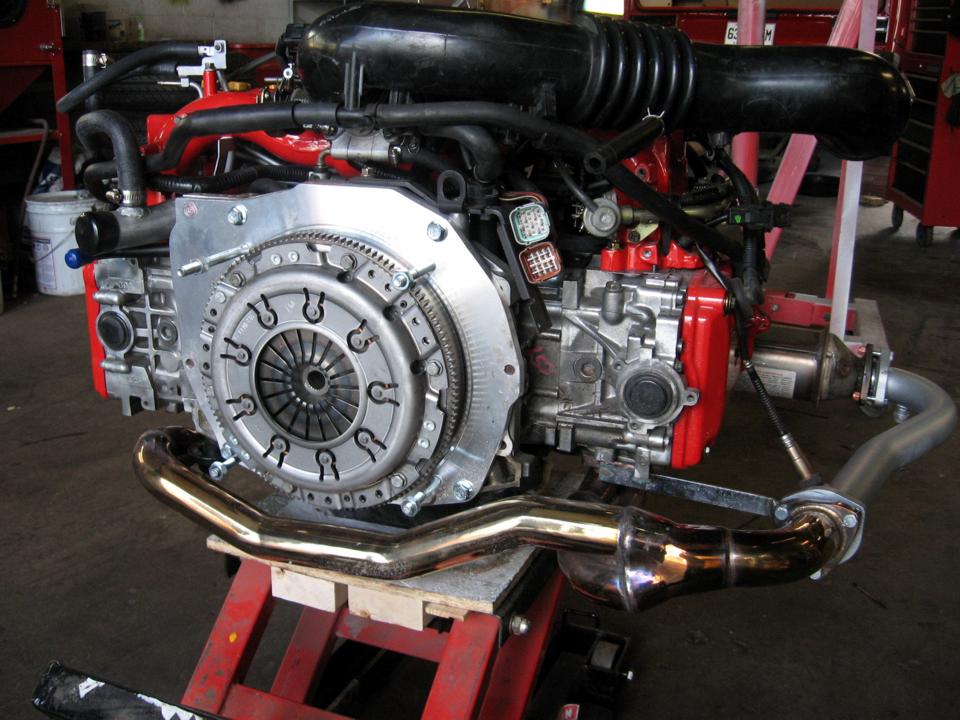

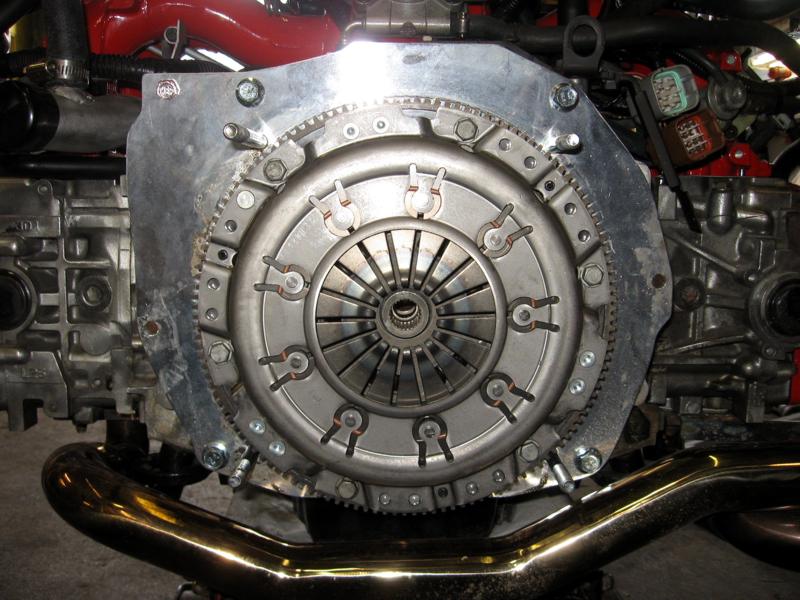
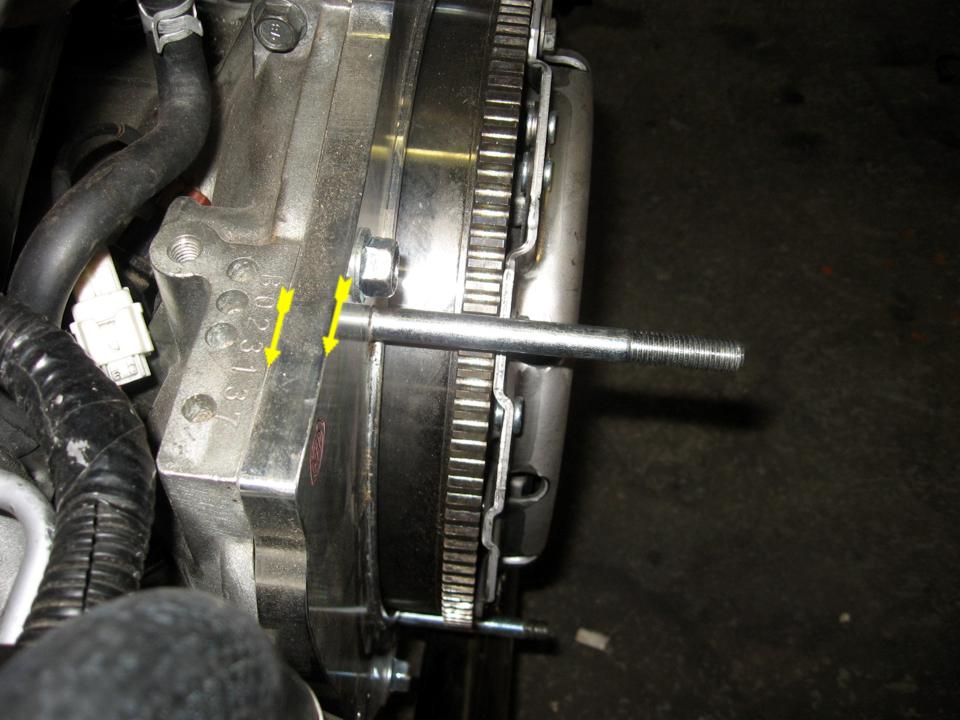
Voilà la FAMEUSE plaque qui adapte le moteur Subaru à la transmission VW. Celle-ci est d'abord visée au moteur. On peut voir aussi la "Flywheel" (flèche jaune) modifiée et l'embrayage LUK. Les quatre "studs" à gauche sont positionnés parfaitement au même endroit que l'ancien moteur.
This IS the famous adapting plate that join your tranny to the Subi engine, this one is bolted to the Subi first. You can also see the new special flywheel (yellow arrow) and the new LUK clutch. The 4 new studs on left are on "positioned" on the plate so they are on the exact same place then your old VW engine and fit the tranny nicely.

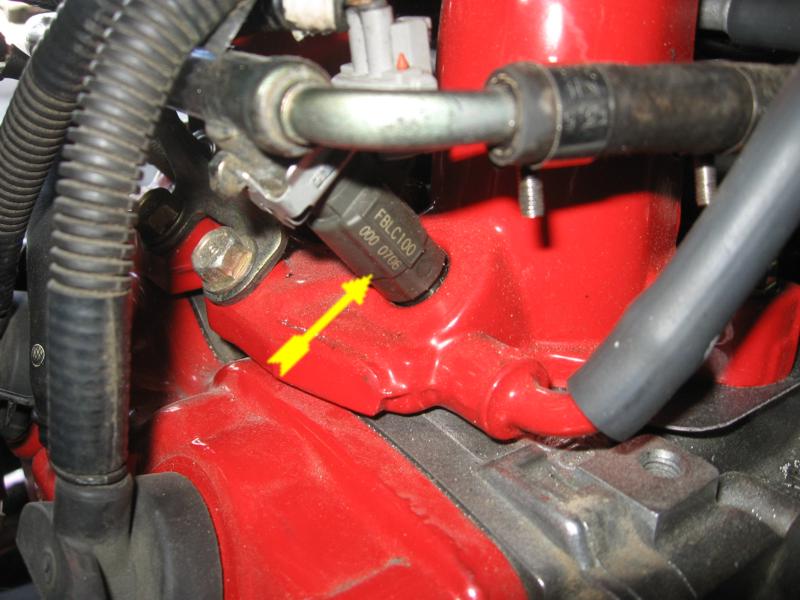
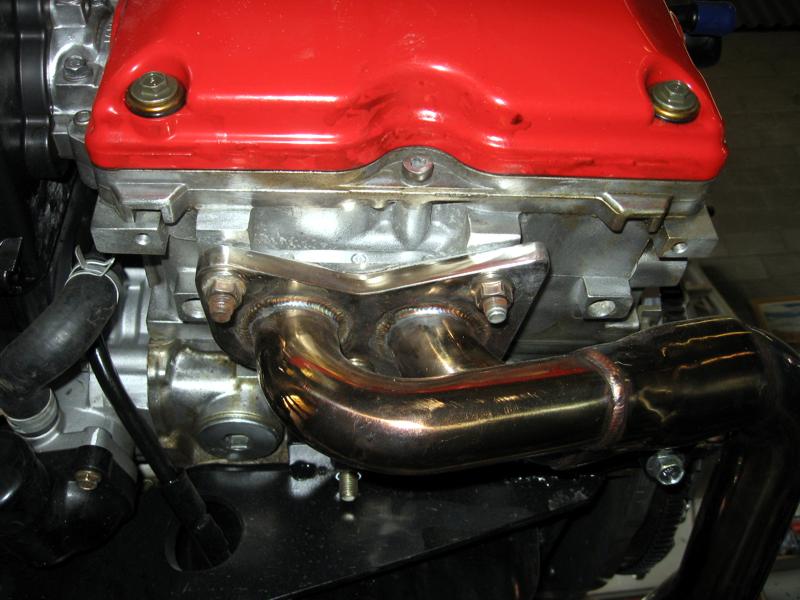
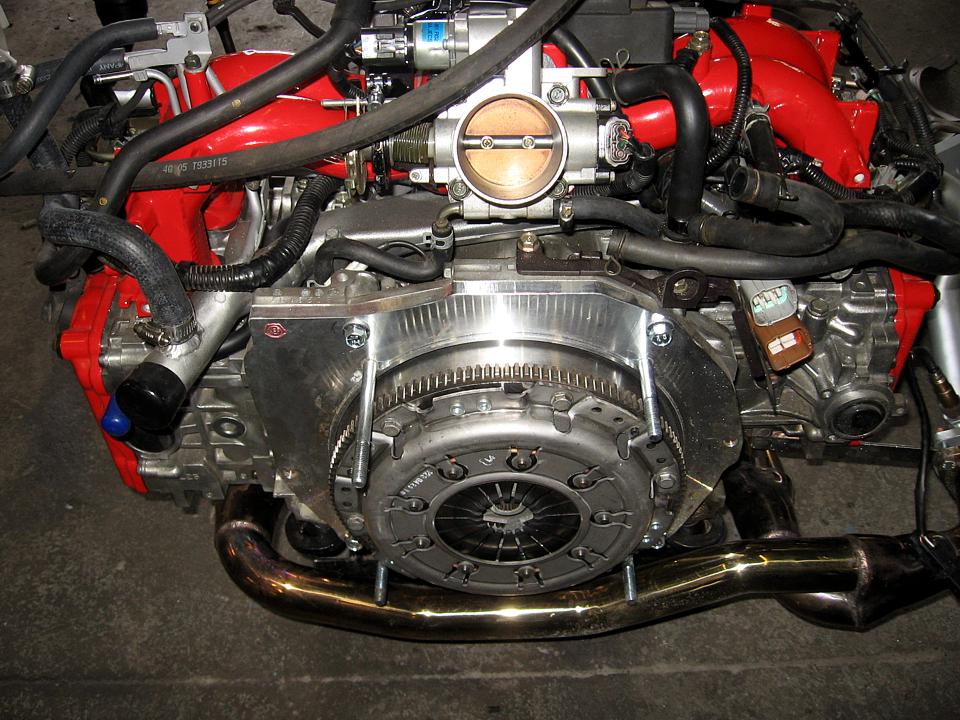
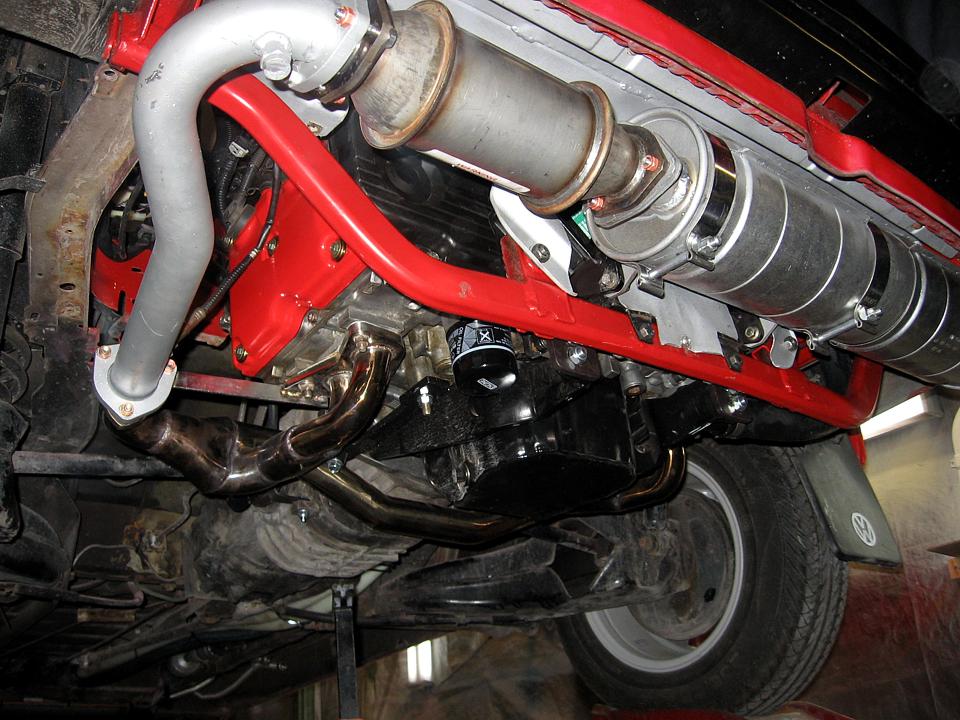
Voilà une autre pièce maîtresse fait sur mesure, soit le "header" en "Stainless Steel". La sortie des gaz est directement accouplée aux têtes et rejoint l'ancien (ou nouveau!) système d'échappement d'origine d'un 2.1L (1986-91). Remarquez une modification au niveau du positionnement de la sonde d'oxygène.
Here is one of the master piece, the stainless steel headers, this one join the 2 heads and mate the stock 2.1L exhaust system (new or yours). Take note of the OS sender position, different then the VW one.
C'est fini les lignes flexibles d'essence et rail en plastique, voici un injecteur Subaru bien attaché au moteur à l'aide de rails et une support en métal solide. Seulement certains petits joins flexibles sont utilisés.
We are done with flexible fuel hoses, plastic rail, this is a Subaru injector, hold there with a metal solid bracket and a metal rail. Only a few small flex line are used. Main line are also made of metal.

Simple et fonctionnel, alternateur central, pompe à direction assistée compacte. On peut voir la similarité du positionnement du système d'échappement entre le VW et le Subaru. Plus d'AFM dispendieux.
Simple and functional, central ALT, compact PS pump, you can see how the exhaust system stay in the same position as the VW one. No more expensive AFM.

Une jolie vue du couvert de valve droit, bougies scellées contre l'eau, rail d'injecteurs en métal, ligne de PS, ligne de retour du liquide refroidissant.
A nice view of the right side valve cover, sealed plugs, metal injector rail, PS line, return outlet of the main coolant line.

Remplissage d'huile. I faut enlever le couvert moteur pour y accéder, par contre, il est toujours possible de vérifier l'huile sans l'ouvrir et d'utiliser la même petite porte arrière qu'avant..
Oil fill tube, to put oil you now need to remove the engine hatch, but it's still possible to check oil level from the same rear small door as before.
Ha! enfin, un beau joint têtes-moteur épais et solide! Fini les fuites d'échappement brûlantes entre les deux qui sont la cause de bien des problèmes sur les moteur VW.
Haaa... Finally, i thick exhaust flange, matting surface is now solide and sealed with no possible warping like the old VW engine had. This was a real dangerous problem on Wasser engine, hot air leak at the heads junction was the cause of many problems

Adaptation au câble des gaz d'origine, simple et efficace.
The small mod at the throttle body to adapt to the original stock gas cable

Différence entre le régulateur bleu VW de 20 ans et le petit Subaru.
20 years later... in blue, a classic VW fuel pressure regulator and the Subi one.
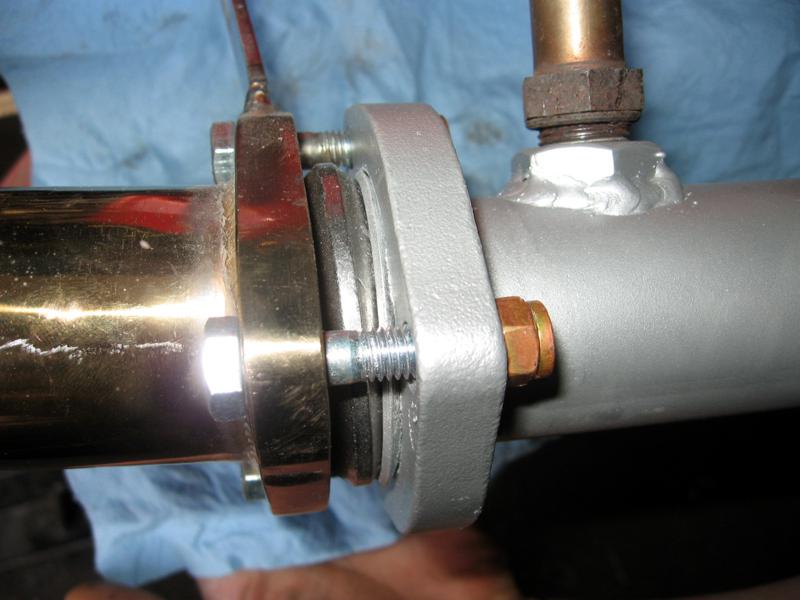
Même les boulons et écroues du système d'échappement sont de première qualité.
Even the nuts and bolts are of first quality.

L'utilisation des supports de moteur d'origine en rouge.
Showing (well, i nice engine...) the stock motor mount.
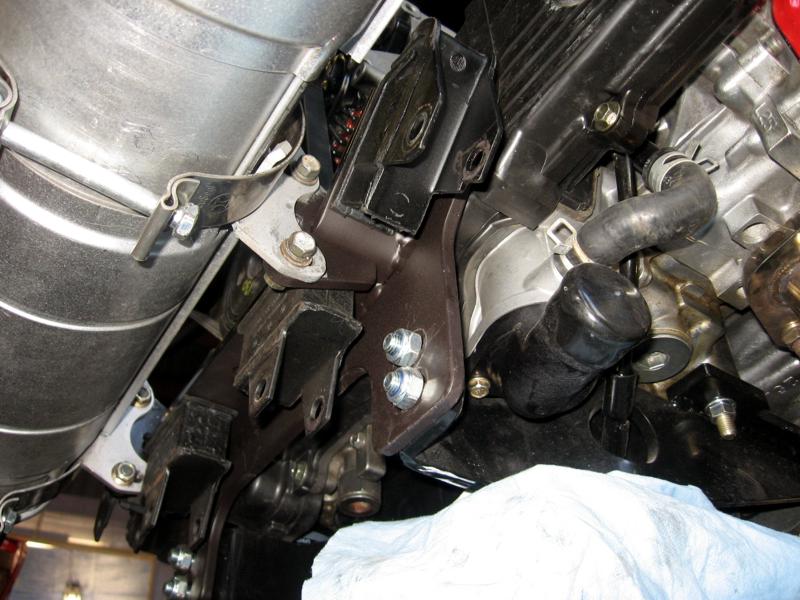
Vue des pièces neuves; les supports moteur flexibles VW, support d'échappement, le fameux support moteur (en noir) qui s'adapte à la membrane d'origine VW. La sortie de liquide refroidissant avec le capuchon noir.
View of some news and important parts; the 4 new VW flex engine mount installed on the metal Subaru engine carier to VW engine carier bar. The hor coolant exit port (with black cap)
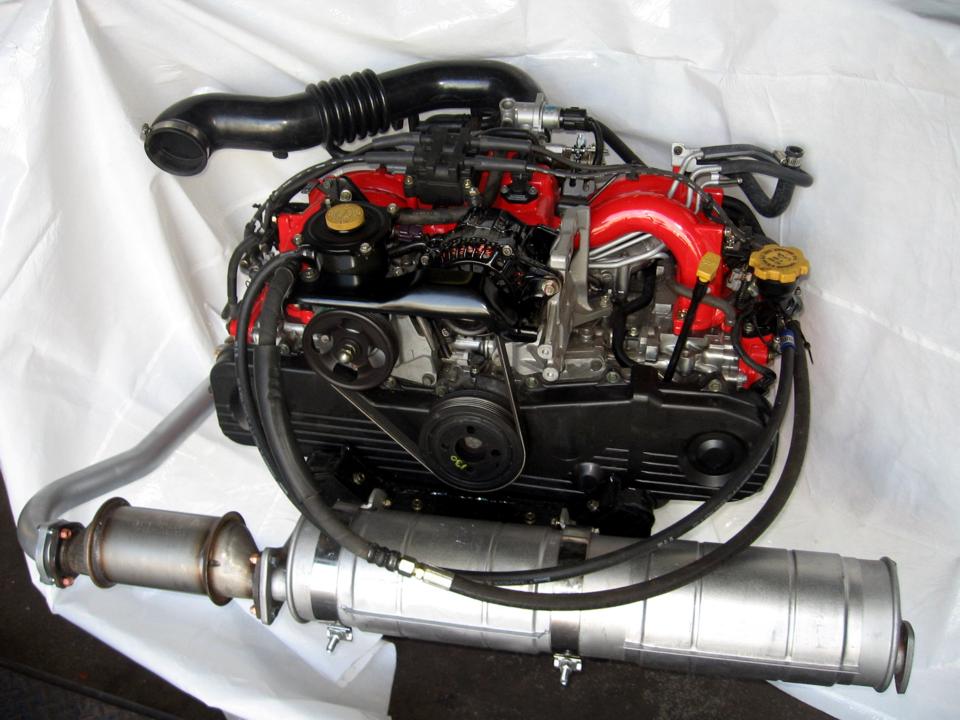
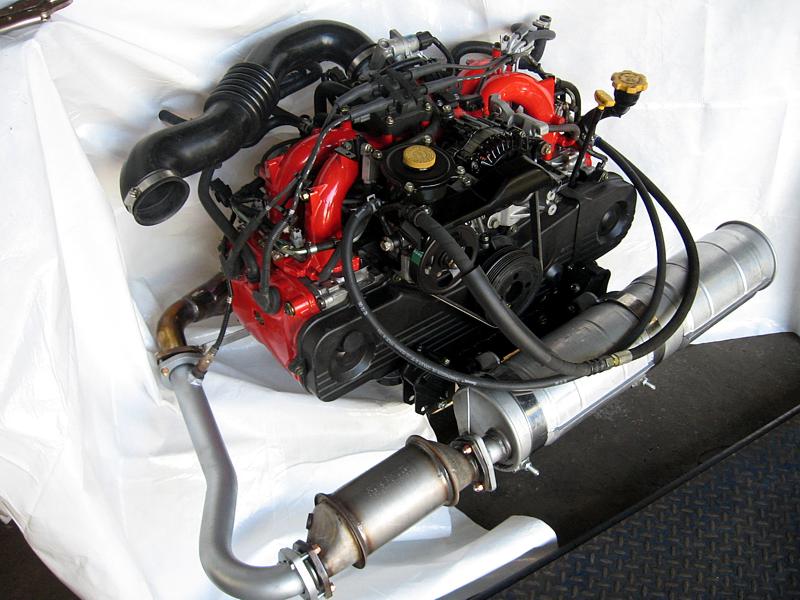

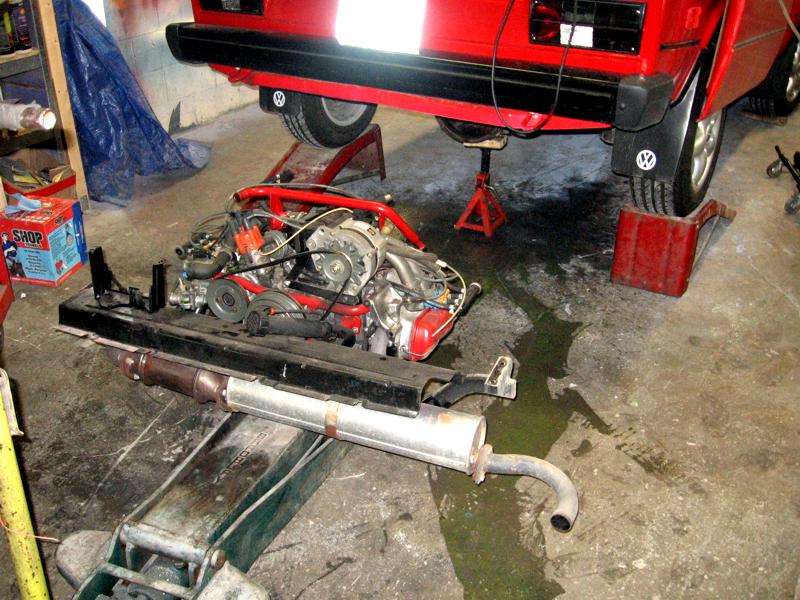
Juste pour le plaisir de l'œil
Just for pleasure
A comparison between the 2 engines, a humble but old 20 years old technology and a modern one.

The installation, simply... to simple, almost scary. Everything is ready.

Il faut plier légèrement le métal par l'intérieur afin de faire place aux lignes de refroidissement futures (flèche jaune). Flèche rouge: à droite; les deux lignes venant du radiateur. À gauche, les lignes des chaufferettes.
We need to bend the right corner (yellow arrow) so the new coolant lines/connections will clear. The right red arrows show the main coolant line going and coming from radiator. The left one show the heaters lines
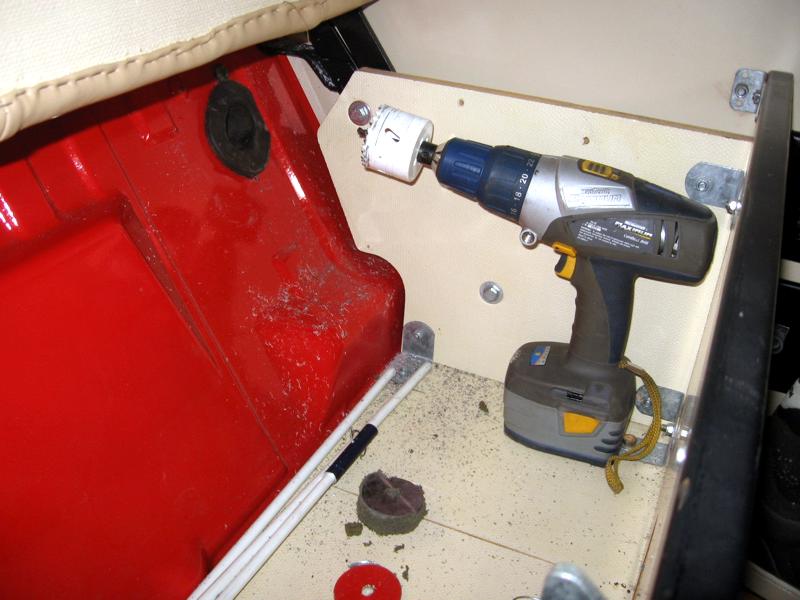
Les nouveaux passages des lignes à essence. Le trou original en est un, mais il faut percer un second.
The new fuel line hole, one was the old one, we need to drill a new one.

La nouvelle position du réservoir d'expansion, le nouveau support qui sert aussi à tenir le nouveau tube de saignement du système de refroidissement.
The new EX tank location with it's new bracket, it also hold the new coolant bleeding tube.

Vue de la plaque adaptatrice, des "Studs" et de l'embrayage.
View of the KEP adaptor plate, the studs that fit to your tranny and the LUK clutch
Vue des 4 vis qui tiennent la plaque au Subaru.
View of the 4 bolt that hold the plate to the Subi engine.
Une autre vue de la plaque et des vis
Another nice view of the plate and screws.
Prêt ! Cela prend 2 minutes.
Ready, 2 minutes to push this one IN

Voila!
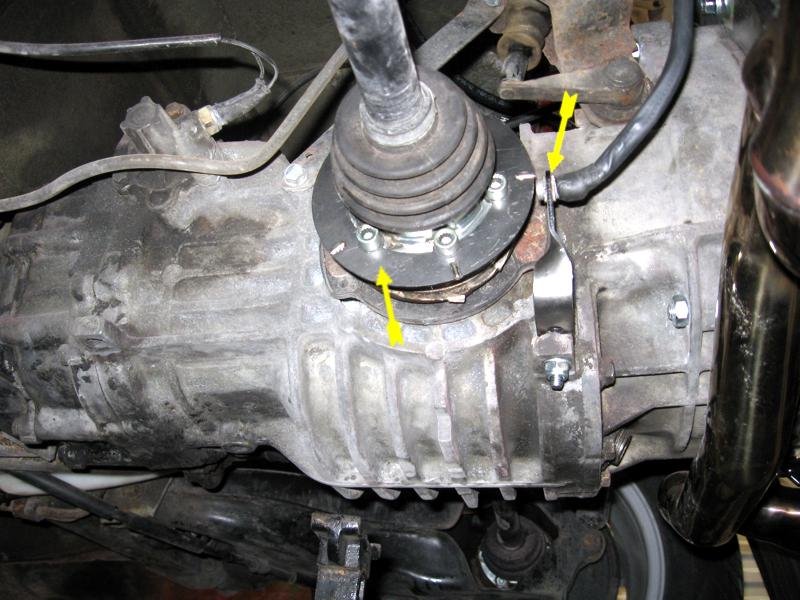
Le "Speed sensor" installé sur le cardan, cette pièce sert à lire la vitesse du véhicule, et l'ordi s'ajuste en partie avec cette donnée.
The "Speed Sensor", it give feedback to the ECU about speed.

Installation des nouvelle connections (lignes) de liquide refroidissant.
Installation of the new connection/ coolant line.

Installation de la fameuse couette d'injection pour fins de test. Notez que l''ordi (ECU) finira sous le banc arrière.
Installation of the FI harness, the ECU is in the back on the picture but will end up under the rear bench.
Une vue très explicite du dessous du moteur. Elle montre la "Flywheel", la plaque, le moteur et la transmission, en gros. Le "Joint" entre les deux sera fermé.
A nice explicit view of the matting surface, it show the engine, flywheel (arrow), plate and tranny. This picture tell a lot! but i'm not sure you see everything :-)
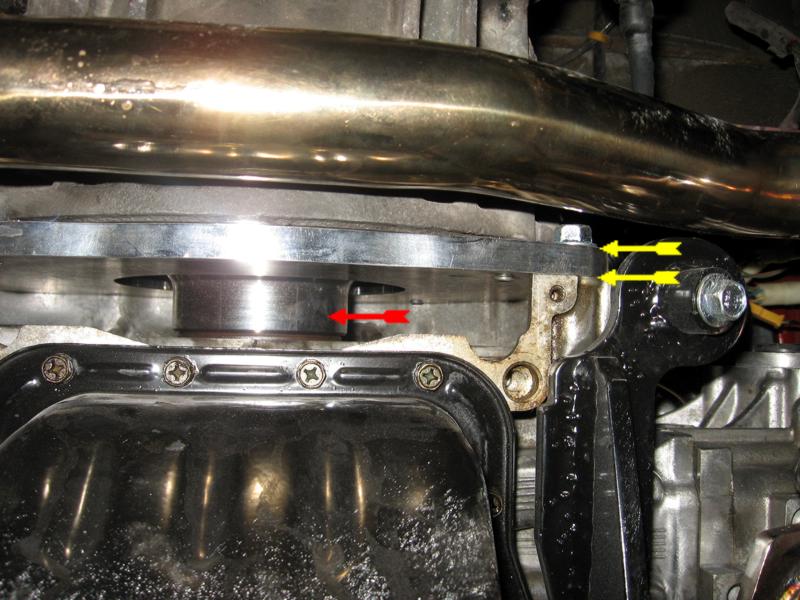
Le support principal en rouge a reculé d'environ deux pouces. Il a fallu percer de nouveaux trous. Remarquez la ressemblance avec le moteur d'origine, même la plaque anti-chaleur est toujours là.
The red engine carrier had to move 2 in back, so the need for 4 new holes and 2 modified reinforce plate is needed. Everything is IN the Vanaru kit, it's almost scary!!!! Even the heat shield is slightly modified but fit nicely over the muffler.
Dans le cas d'un pré 85, il faut percer un trou (existant sur les 86+) pour passer la nouvelle couette sous le banc.
On pre 85, we need to drill a hole for the harness, it's there on 86+
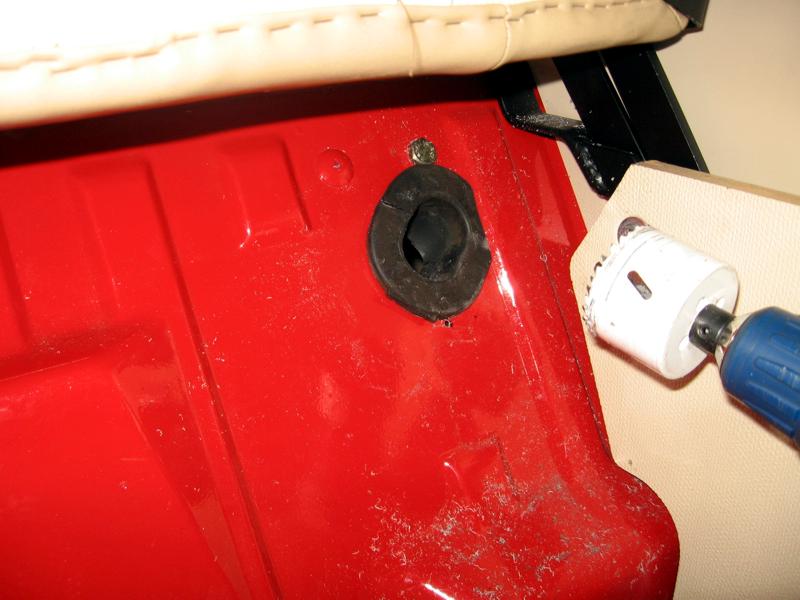
Installation du "Gromet" Subaru
The Subaru gromet installation.
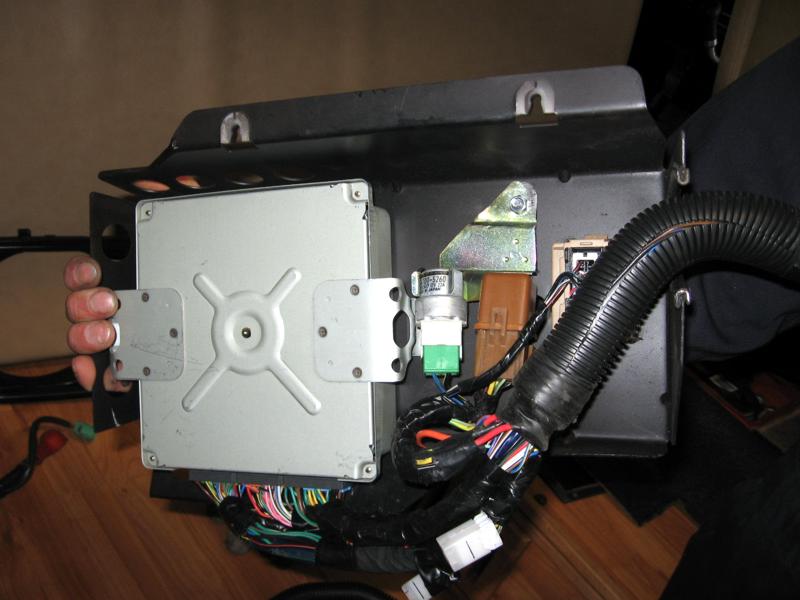
La boîte protectrice inclus l'ECU, les relais et la prise pour la lecture des diagnostiques moteur OBD2
The protective plate incude the ECU, relay's and the port for the OBD2 diagnostic system.

Installation de la boîte sur le côté gauche du banc. À la même place que l'ancien ECU sur les 86+
The new box goes where the old ECU was on 2.1L/86+, on the left wall of the rear bench.

La plaque anti-chaleur, les supports et la tige pour vérifier l'huile.
The heat shield view from top, the engine mounts and the dip stick.
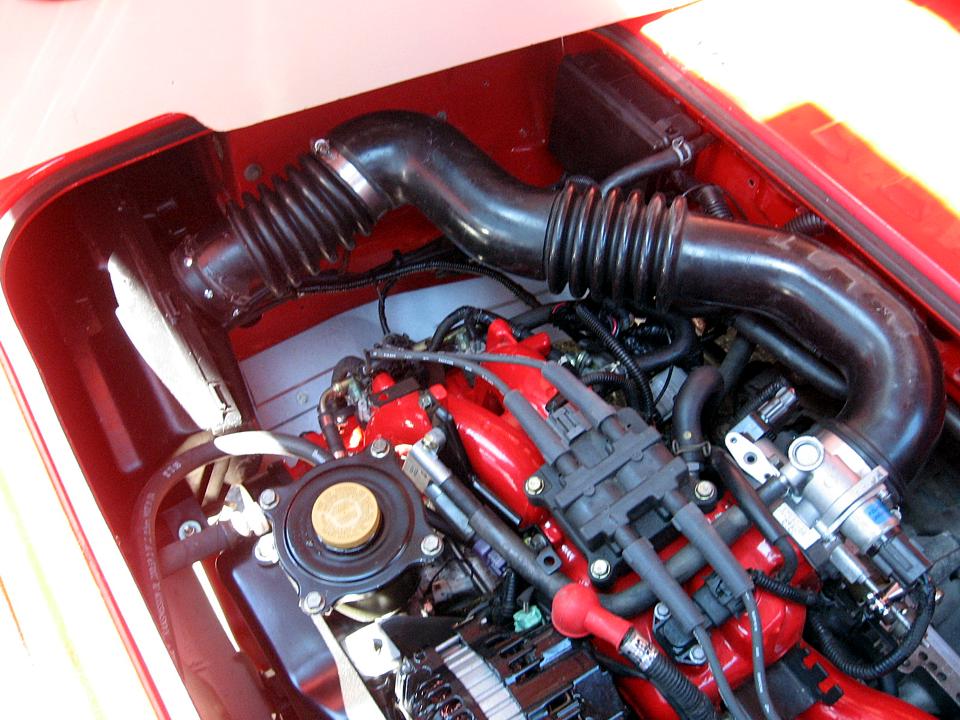
Installation de la boîte du filtre à air, du tube et du détecteur d'altitude.
Installation of the air box/filter, neck and the atmospheric sensor (ajust the FI/mixture in altitude)
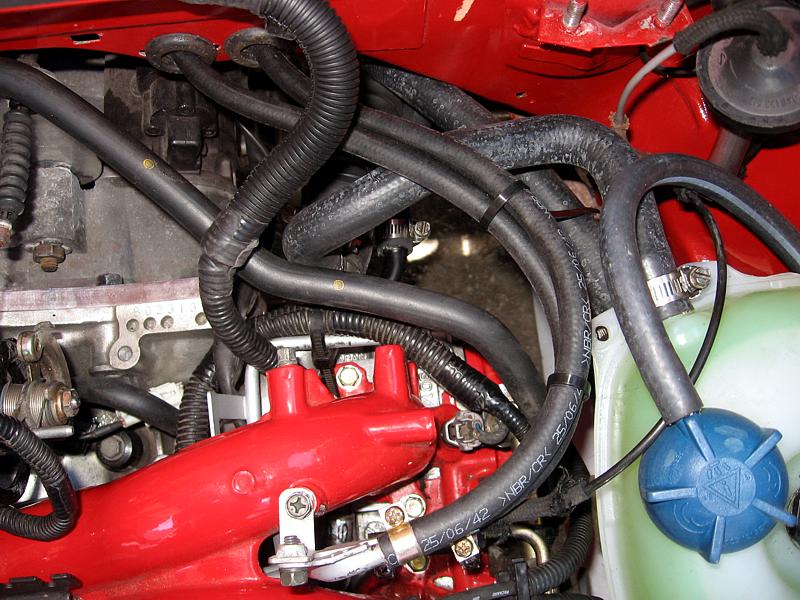
Les connections d'essence, des lignes de refroidissement, de la ligne de saignement...
All the connections are on the right side, you can see: the fuel lines, the main bleeder line, the coolant lines... more better picture to come!
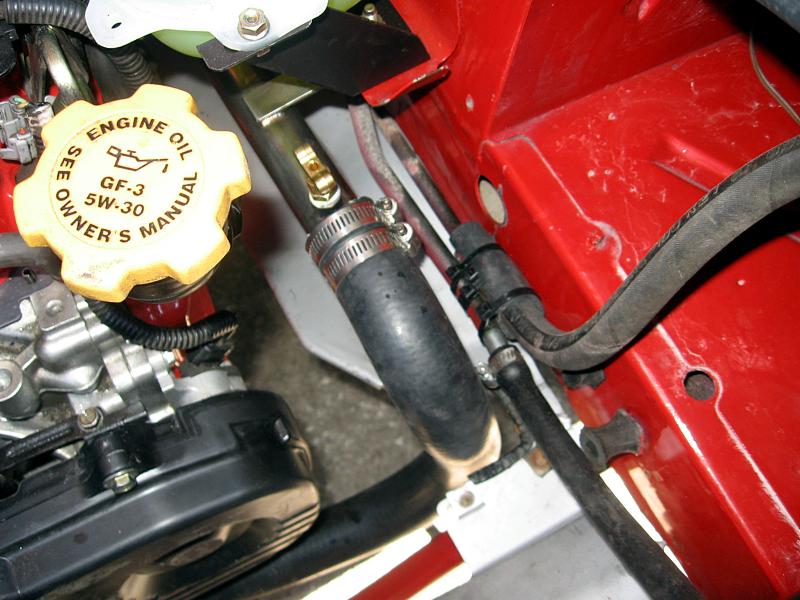
Les connections de la direction assistée, et une belle vue du "Bleeder" arrière.
The power steering line connection, also, a nice view of the bleeder tube.

On voit en partie les connections des lignes principales de liquide refroidissant
On right, a view of the main coollant line on right, the big one is the outgoing hot coolant line.
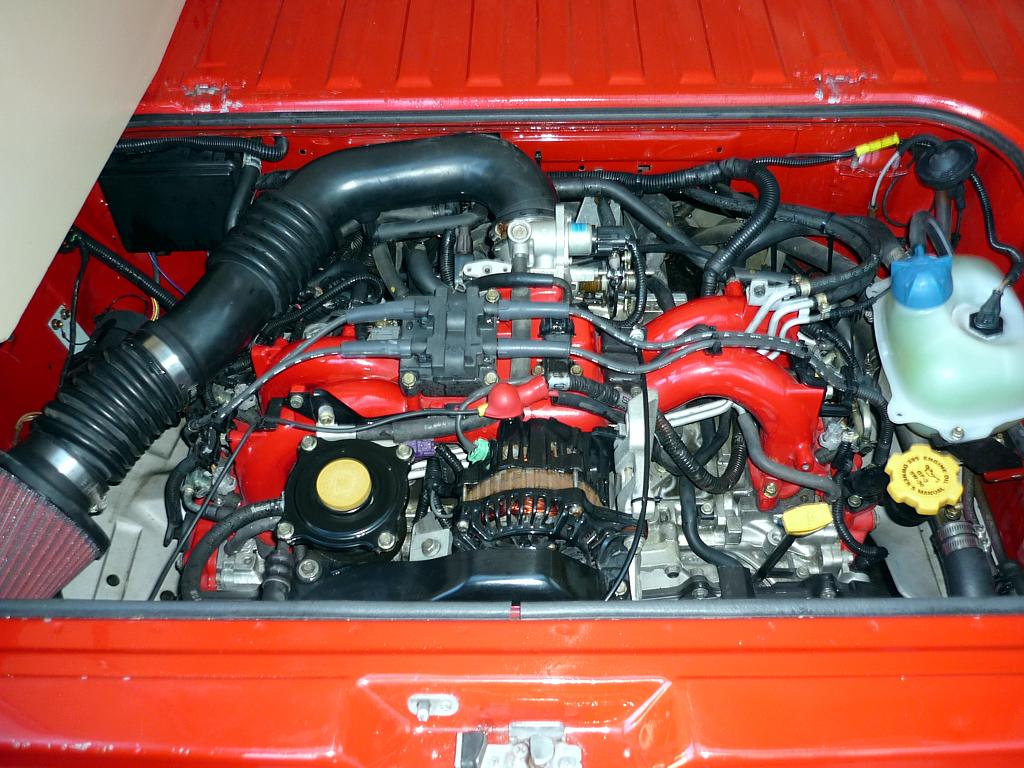
Way more stuff to come... i will, with time, add more precise section/pictures, it will almost be a step by step engine installation
 |
 |
 |
 |
| Que dire?
J'ai pas grand crédit à prendre pour ce qui est du
moteur lui même, il revient à Hans et John de Vanaru. Je pense être en
mesure d'avouer quand je vois du TRÈS beau travail, quand j'en vois... Et là, je suis
bouche bée! Je remet donc le crédit à cette petite compagnie qui amis une énergie folle
à penser une superbe motorisation optionnelle
pour nos camions. Je n'appelle même plus cela une conversion, mais une option !
Plusieurs n'aiment pas l'idée de greffer une autre marque de motorisation
sur un véhicule, et honnêtement, je peux comprendre. Celà peut fait peur...
Même
moi j'ai eu des doutes à un certain moment donné. Aujourd'hui, je
comprends qu'il y'a quelque
chose avec le moteur Subaru qui est différent sur ce
plan. Sur tous les points, j'en arrive au constat que cela aurait du
être le moteur du Vanagon dès le départ.
Plusieurs ont l'impression que greffer quelque chose sur un autre model
est du "patentage", C'était très certainement le cas des pionniers des
conversions Subaru 1.8, et ceux qui on fait cela sur les vieux Bus avec le vieux
Bus. À cette époque, c'était du charcutage.
En date du 24 Novembre 2008
j'ai déjà parcourue 45,000km depuis l'installation, incluant mon
voyage au Mexique. Et cela, sans aucun
problèmes.
|
What to
say? First, i wanna thanks Hans from Vanaru for putting a "exemplary" conversion/engine together, i think it's simply perfect. And it's comming from a guys that save wasser engine each day. It's not because i know Hans or neither because i will make money out of that, at all, my comments are comming from a Vanagon driver. It took me/us less time to put that conversion (i don't like that word no more, it should be call: a engine upgrade, or option ) in the van than it sometime take me to put back a wasser in. Worse, the Vanaru engine fit's better, yea, pure and simple. It's what VW should have design for that great van. Many are afraid of conversion, they think it not normal or impossible that another engine company could be fitted nicely in their van/car, but it's just mechanical part fitted ON mechanical parts, everything is possible if done the right way, but this is far better than the right way, it's meant to be there. Thanks to Vanaru for building the perfect Vanagon engine replacement, there is so much nice little details in that conversion that it's simply amazing. Today, we put the rest of the stuff in, that superb harness, the air filter neck and unit, the side shield... what else??? bah, i few small thing, i was taking my time to observe all the nice "fitting" details that Vanaru as done to make a Subaru engine fit PERFECTLY in that engine bay and onto the transmission. So much details... men, those guys made the perfect kit! Yeas, there is a few companies out there that do conversion, we all know that Kenedy and Small car built most of the parts... but Vanaru made it perfect and easy to install, it's a REAL TURN-KEY, no joke here. Now, you go buy parts from all those parts maker, put them together, find a GOOD donor car/engine, take everyting you need out (are you sure you have enverything?), now put it together the right way, with the right torque on each bolt... now, fit it in the van... good luck. Those guys did all the reserch and work for you, try and re-try, tested, start again. test again... men, i will call that "engine perfection". Affer a small road test this afternoon, i sent Hans away... go relax my friend, i don't need you no more... i had to fix a few little thing, a little more bleeding, the ALT light still on (easy fix), one hose was not perfectly install (my mistake)... bah, small stuff, i felt the van was ready. So i went home and had dinner.... and i said to my girlfriend... ok, im going for a ride, the real test. I starded the van, vroummm.... 1200 rpm, 1000, 900, 650... steady, no vibration what so ever. Smooth like hell. What a pleasure to listen to... nothing! Just a smooth humming, so just for fun, i reved the engine just to listen to it... so you know what, it does make a VW Wasser sound, no, it's a "perfect" Water-Boxer sound. The RPM needle is "STILL" at 650, it simply dosen't move. The first feeling i had was strange, at each stop light, it though that the engine had stalled!!! he he he.. no sound, no vibration... nothing, but IT was running, steady at 650rpm! So i went... full moon, nice spring weather... nice feeling. I took the highway... and yea, of course, a big rig is comming on the right lane.. time to try that Subi... i just push the accelerator and bang!!! i was way in front of that rig at 75mph at about 4000rpm, so i went... to 95mph easy, dargn!!! this thing keep pushing... slow down bro.. but the van felt just right even at that speed, of course, my van as 90% new parts so it feel... new, but i didn't know that a Vanagon could be so steady and feel so solid, even a those speed. So i came back slowly, hoping for some little troubles after such a tranformation, but nothing, just a steady pleasant drive at 65mph, temp needle in the middle, no light, nothing. So i stop near the St-Laurent river on the south shore of Montreal, nice view of the bridge, the city, a big boat passing throught, the full moon, some light music.... after 10 minutes, i realise that the engine was still runing... so i stoped it, went back to see if everything was ok... open the hatch... nothing, simply nothing. So for those who are scared and/or are purist, i'm sorry that you had to reed that. For the other's, i hope you have enjoy, and if you ever thing about a conversion instead of re-building your wasser.. think twice about where you should put your money.
November 24 2008. Since the
installation, about 1.5 year ago, i have done over 45,000km (28,000miles) including my
Mexico trip.
Without a single problem... ho yea, i had to change the oil :-). We now
do mostly do Subaru / Vanaru
conversion. We already did over 18 and i have a lot more to do. Other Subaru / Vanaru stuff on my site:
|

Un petit Vidéo du premier démarrage, cliquez sur l'image (format WMV)
A small video clip of the first engine test, i'm like a kid (WMV format)
Le véhicule et son moteur...
The van and the engine...
(37 meg, format WMV, 640 x 480)
Le "road test", smooth et calme, juste
pour montre le coté confortable de la puissance, attention, ne pas faire
comme moi, conduire et filmer...
The road test, smooth and easy, just to show how nice
the ride is, beware, don't do that at home, i was friving and filming...
(30 meg, format WMV, 640 x 480)