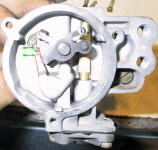
| Solex 32-34 PDSIT 3/2 Carburetor(s) rebuilt (Bus 73/74,
early and late models). (click on any pictures for a bigger view)
From my motorcycle mechanic years, I can tell
you that those carbs are fine carbs, if properly maintain, seal and
adjusted I think that they will be able to give you a few more years of
work, maybe another decade!!! (and they have choke!)
This is a step-by-step carbs rebuilt procedure (not that difficult at all
but time consuming), . Before you begin (it's a 15 hours job) you should
check a few things such as if all moving parts are still in an acceptable
condition.
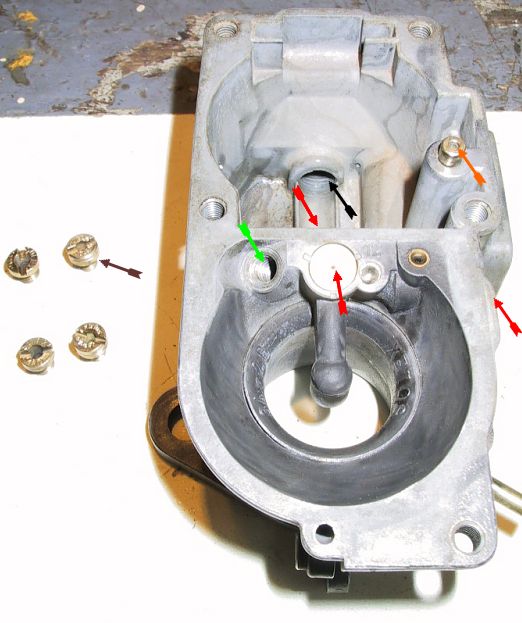
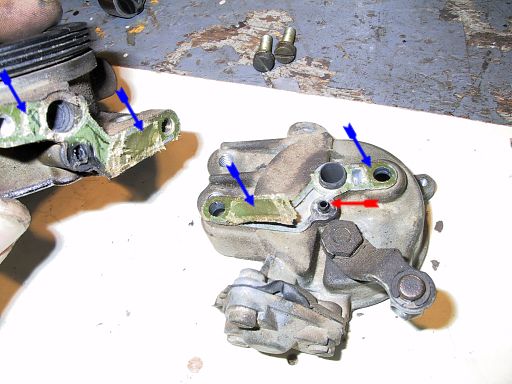
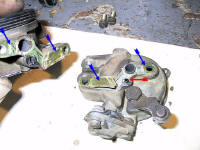
Ex.: Is the main butterfly shaft too loose (this one could be rebuilt with
a new bushing by a professional machinist), is the main pump injection
twisted tube (see picture) still solid, this is a very fragile part (well,
with some good old JB-Weld everything is possible), Also inspect the
straight brass / copper tube for crack (mine was cracked), it is the one
inline with the main / dual air mixture screw on the left carburetor (see
picture).
Tool: 2 carbs rebuilt kit (available at
www.cip1.com or www.busdepot.com
), an air compressor is a good thing to have, compress air is one of the
best cleaning tool for carburetors, but it is not a must. Carbs cleaner in
spray, old gasket remover spray, brake cleaner for cleaning the exterior
carb body, degreaser. Some metal and nylon brush. A Dremel tool with wire
brush is almost a must!!! And some normal tools like long nose pliers,
fine screwdriver (absolutely NO Beer before the end of your job. He he he) |
|
Step 1 Remove
carb form the bus:
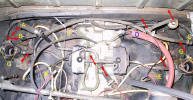 |
Remove air filter(s) element, Remove / unplug
every hoses from carbs (letters), check for leak/crack at vacuum (red
arrow), unplug fuel hoses and block the hole of those one. |
|
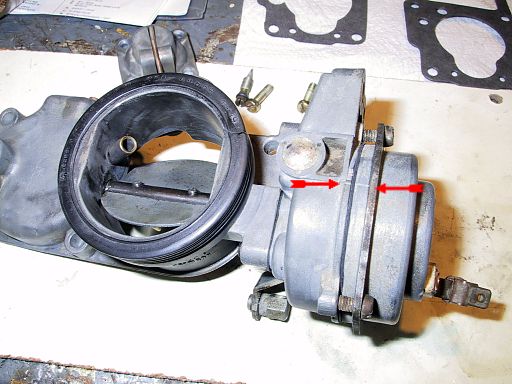
| Step 2 |
 |
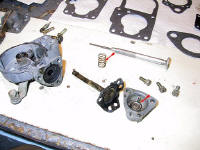
Split the 2 main carbs body at screws "D", be careful
with tube "E", check if "A" surface is flat and not pitted, check if
screw "C" is tight, check end-play at butterfly shaft, if too loose
have the shaft bushing redone by a pro. Start cleaning the lower body
part. External and internal with carb cleaner and a small brush. |
|
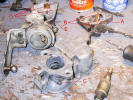
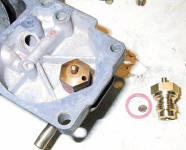
Step 3
(this si the right carb, they are the same, specifications for the left
carb are at the end!)
 |
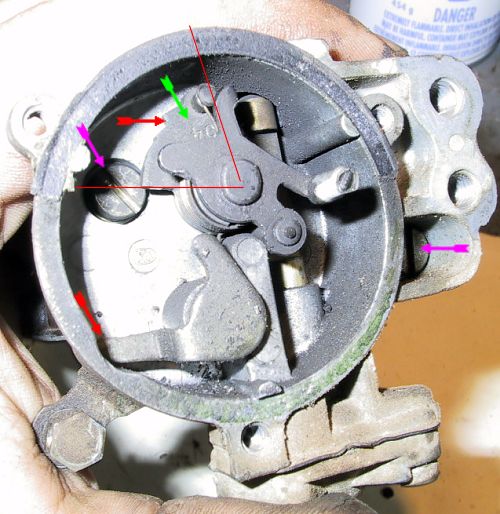
Remove both "Jet"
(air & fuel) with a GOOD flat screw driver, gently remove both JET,
one is located at the green arrow (air) and the other one (fuel) is
located at the upper red arrow, you will have to remove the jet plug /
fuel drain plug (black arrow) to be able to remove the fuel jet (not
shown on the picture). Clean everything and spray some carb cleaner in
side the green arrow, carb cleaner should go out in all red
arrow location!!!! If you have compress air, use it now everywhere.
(Picture show the acceleration pump removed - right upper side) Ckeck
the jets to see if they are the same number??? mine were not! |
|
| Step 4 |
 |
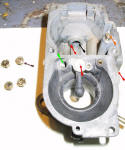
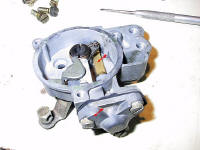
Remove the 3 screws
that hold the choke element, remove the choke (the electric choke is
the one with the spring-like flat metal wire inside and the 12V on it).
Check if the choke cam is misplace (green arrow), the good position is
shown on the picture. The 2 cam should meet at the 2 red arrows when
the carb is at the close position and cold. |
|
| Step 5 |
 |
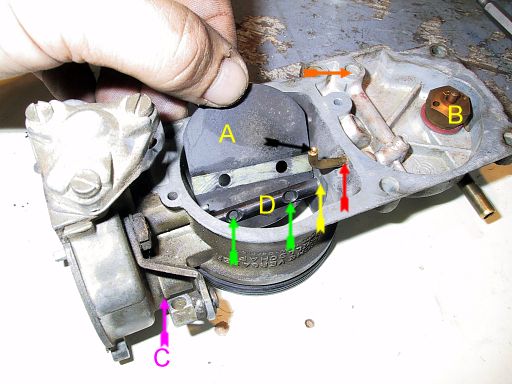
To replace the
choke to upper body gasket you will have to remove the choke plate
(A), to do so, remove both choke plate screws (green arow), slide this
one out. Check if the fuel pump injection tube is solid (very fragile
part, Red arrow). Blow air / carb cleaner in the fuel pump injection
hole (orange arrow), it should go out at the "A" hole. |
|
| Step 6 |
 |
You can now remove
the choke shaft, be carefull not to lose the 2 very small spacer (on
the shaft - purple arrow) at each end of the choke plate (yellow arrow
on step 5)), Inspect the
choke shaft for excessive loose.. |
|
| Step 7 |
 |
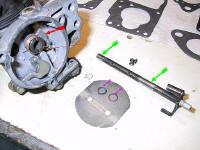
Unscrew the 2
screws (purple arrow on step 4) and remove the choke body from the
main upper body. Remove the old gasket and spray the red arrow hole
with carb cleaner. |
|
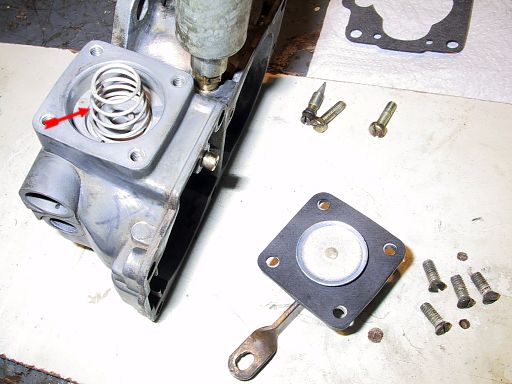
| Step 8 |
 |
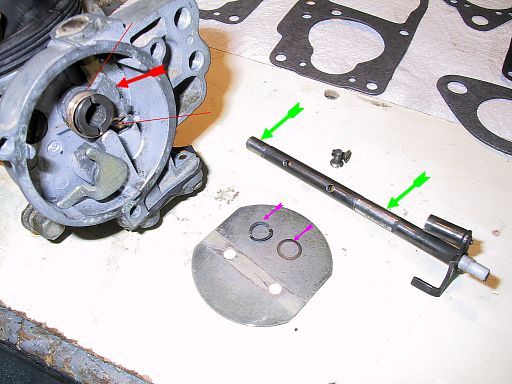
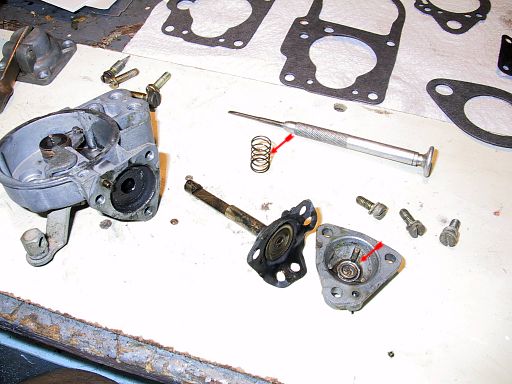
Remove (3 screws)
the choke diaphragm / shaft, take note of the spring position (red
arrow), clean everything. |
|
| Step 8 |
 |
Grease the
NEW
shaft diaphragm. put the new shaft back and be careful to align this
one. |
|
| Step 9 |
 |
Put the new gasket
that joins the upper body to the choke body. Screw back the 2 parts. |
|
| Step 10 |
 |
Put back the choke
shaft and be careful to align the "click choke cam" so it can meet
with the lower arm. Put back the choke plate with the 2 washer (IF
THEY ARE STILL GOOD!!!!!!!!!!! IF NOT THEY WILL FALL INTO THE
COMBUSTION CHAMBER) and 2 screws. |
|
| Step 11 |
 |
Put back the choke
element, align the 2 mark together!!!! Well, thats all depend on the
choke element condition!!!! The most important thing is that it better
be fully open when hot. Better safe than sorry!!!! The main problem
with those sucker is that if you adjust those one so the cam "kick in"
when cold, they don't fully open when hot (so you are stuck with a
rich mixture). The only safe solution is to buy new chokes element!!!!!!!!!!!
(the hell with that for me, i will keep my feet on the pedal)
|
|
| Step 12 |
 |
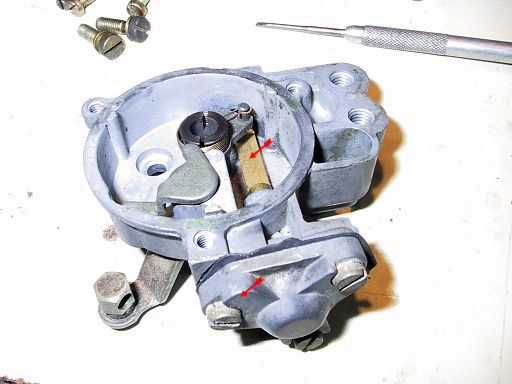
You can remove
and replace the fuel level valve (part of the very complete kit) |
|
| Step 13 |
 |
Change the fuel
injection!!! pump (part of the kit), take note of the spring position
and orientation. You will have (a bit later) to double check the
lenght of the pump stem, the Bentley as a good description of how to
do that. But it is very easy to understand the basic principle when
you are that far in your carbs rebuilt steps. |
|
| Step 14 |
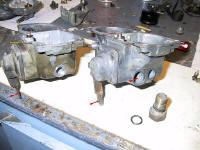 |
This is not really
a step unless you have the late model (on the right) with a second
hole, if so the new o-ring is included in the carb rebuilt kit.
Take note that the pump lever as
a different hole for the stem assembly. The earlier one have a 3 pin
hole adjustment and the late version as a screw type adjuster. |
|
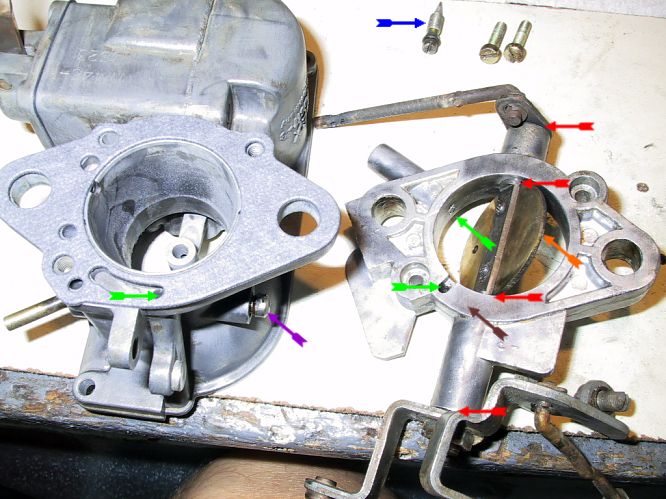
| Step 15 |
 |
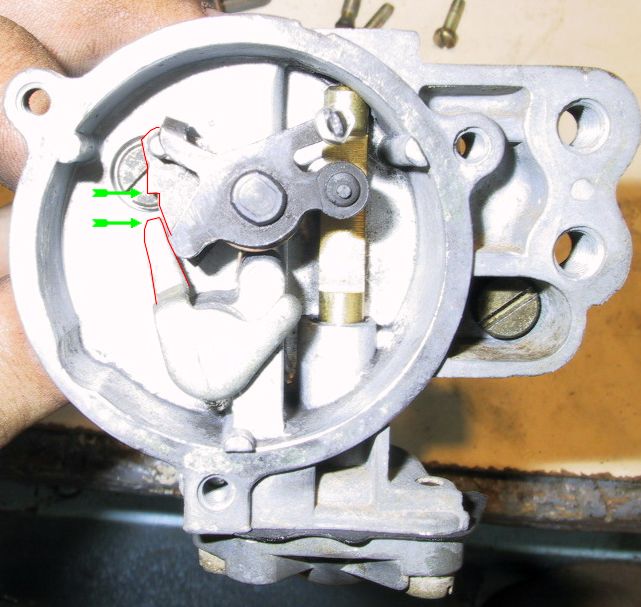
This is a very
important step, cleaning all
the air/fuel passage (including the needle fuel screw - green
arrow). You need to blow air and carb cleaner in those small hole near
the mixture screw. You need to TRIPLE check the carb mating surface (brown
arrow) with the intake, this one needs to be flat like hell. Check the
buterfly shaft fot loose (it is normal on a 30 year old carb that you
have SOME loose but not to much) or excessive play, if to much the
bushing need to be replace or you will suck to much air (red arrow).
You need to gap the buterfly to .010mm max (orange arrow). Secure the
barrel screw (purple arrow). Change the
very important
o-ring on the small screw (blue arrow) put them back together. |
|
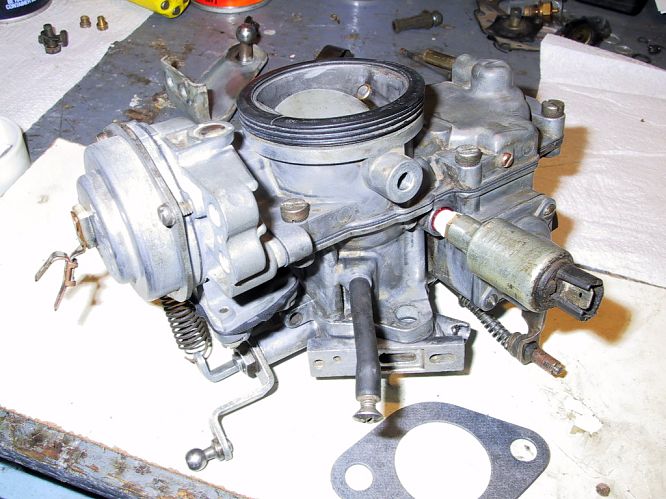
| Step 16 |
 |
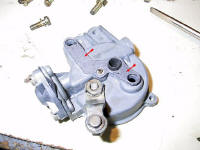
Finish product!!! |
|
| Note about the left
carb and central mixture |
 |
The left carb as a
central mixture and idle control, you need to change the o-ring on
both (mixture & idle) of those screws + the normal screw on step 15 (3
total). DOUBLE CHECK if the tube (green arrow) is not cracked or
broken (mine was). Be careful with that tube and the twisted tube (red
arrow) when cleaning the carb, they are fragile. Seal back the cut-off
valve (orange arrow) |
|
| Basic adjustment |
Put both (on each carb)
needle screw on step 15 at 2.5 - 3 turn out, put the main (on left carb)
mixture screw at 2.5 turn out, idle screw should be 4 turn out or more.
Start the Bus and have some fun (get the bus to a very good mechanic who
know about carbs and equiped to do a good adjustment!!!!!)
(more to come later, cheers,
Ben) |
| |
|
Back |