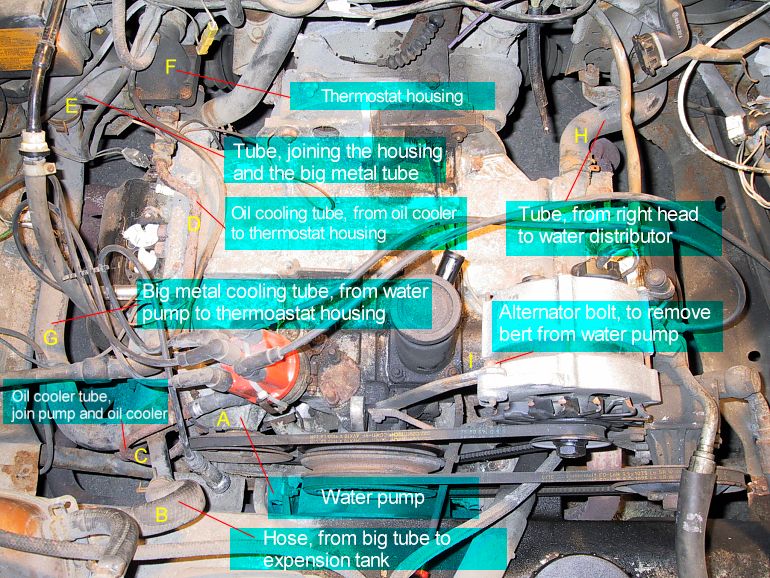
- The following steps are if you don't remove
the crank pulley (on your right)
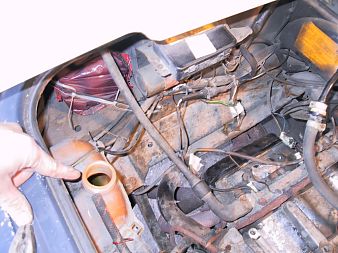
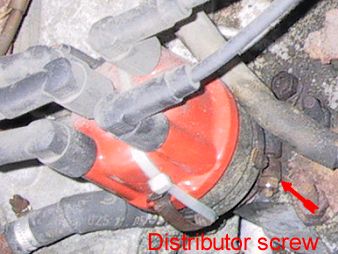
- Remove the Distributor housing, cap and
wire, they are in the way. The distributor housing
is hold in
place by a single screw, it's the one 90° from the distributor
view on the lower part of this one, it strangle the
distributor. (be very careful to mark the distributor
position, this is crucial when putting this one back) (see
Step # 2 picture on the right)
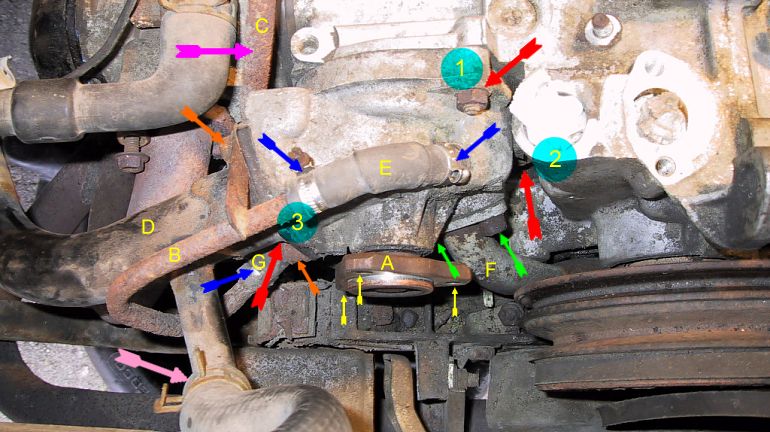
- Fist, put something under the pump section,
more coolant will come out
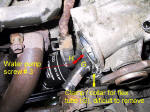
- Remove the 3 x 13mm water pump pulley screw (Yellow
arrow),
it can be hard...use a big adjustable pliers to hold the rear
triangular pulley shaft. (A)
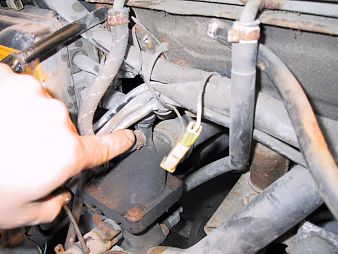
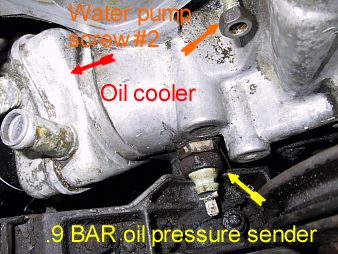
- Remove the small oil cooling tube
(B),
for that you will have to unscrew the collars (Blue arrow) and
remove the upper flex joint (E), removing or leaving the
lower flex joint won't change much.
- Unscrew the 2 Allen screws (Orange arrow) holding the big cooling tube (D),
This can be tricky if the 2 bolts are stuck like mine where. I use
a series of socket extension shaft with a special Allen
socket at the end, you can do that from the lower left side / rear
corner of the van, from there you can see the 2 screw from under the
van but they are about 1 1/2 feet far. If not stuck, you could
probably use a normal Allen key. (see
Steps # 5 # 6 picture on the right)
- Remove the big clamp (pink
arrow) from the expansion tank hose, you can now
remove the big tube (D)
- Unscrew the 2 Allen screws (Green arrow) from the
right smaller lower cooling tube
(F) (this one does the coolant jonction between the left
& right heads), don't try to pull the small (F) tube now, it won't
come out, the pump is in the way. (follow this tube, it goes to the right head, in between
there is a small "junction" flexible black tube with 2 collars,
for now only loose those 2 collars so you can turn the metal
tube (F) to remove the pump. (see
Steps # 8 picture on the right)
- Leave the oil cooler tube (C) there,
no need to remove this one when replacing the pump.
- You are now ready to remove the pump
screws (13mm); unscrew the # 1
screw first, easy. Unscrew the # 2
screw second, a flexible 13mm socket is not a must but it's
more than welcome. Unscrew the # 3,
this one is a bit tricky, what you have to do is find you way
between the 2 oil cooler flexible joint that attach to the 2 metal
oil cooling tube (B & C), if you where able to remove the
flexible (G) oil cooler joint, you won't have any problem.
No need to go under the van to do that, a strait 1/4 socket system
will do the job
- Pull the pump out slowly, the lower small
cooling tube will be a bit in the way, just make you way true.
I hope you're pump is out... Clean everything with brake cleaner.
More to come
later about the installation... |

Step # 2
Steps # 5. # 6

Step # 8

Step # 11 |