| Enlevage / Removing.... | ||||
 |
 |
 |
 |
 |
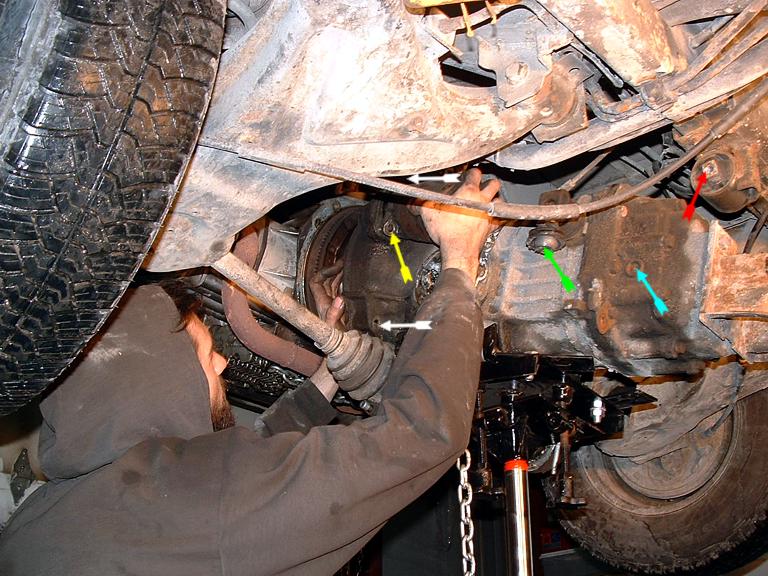
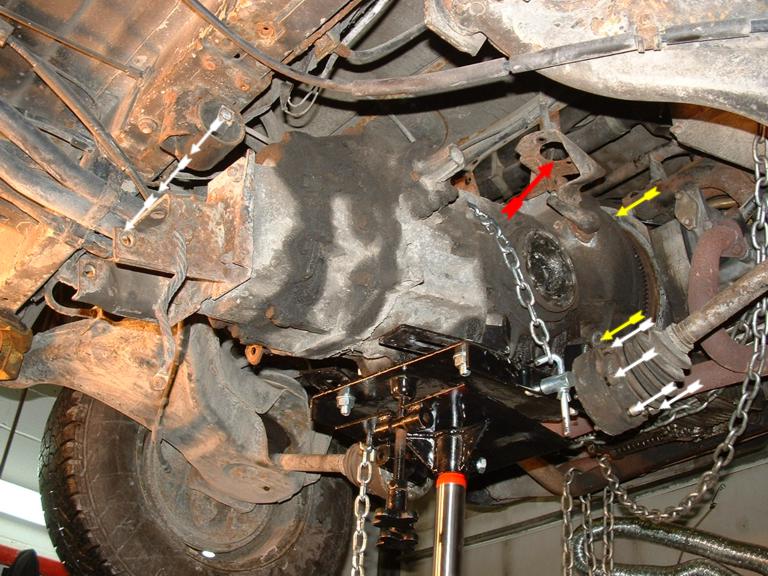
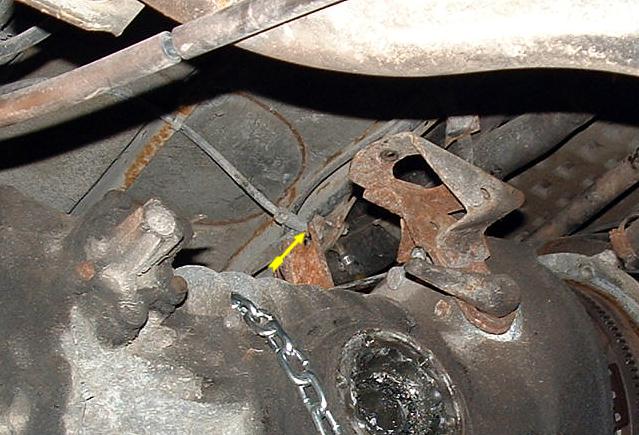
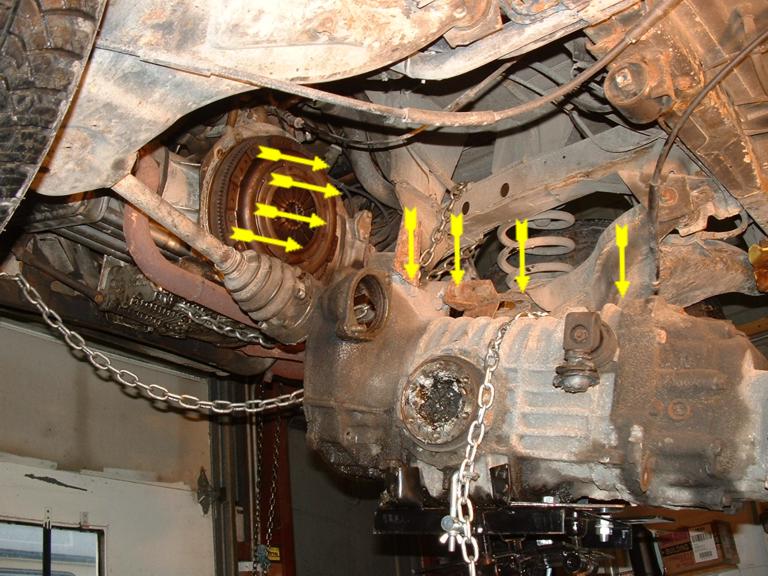
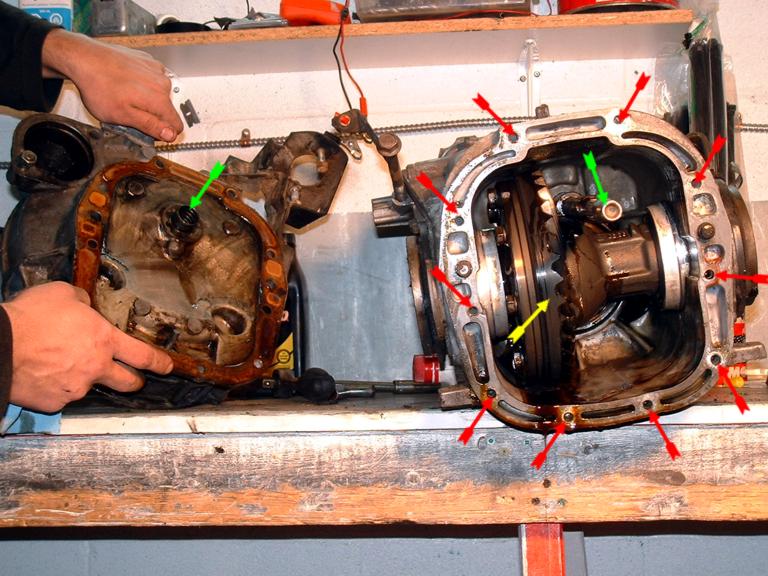
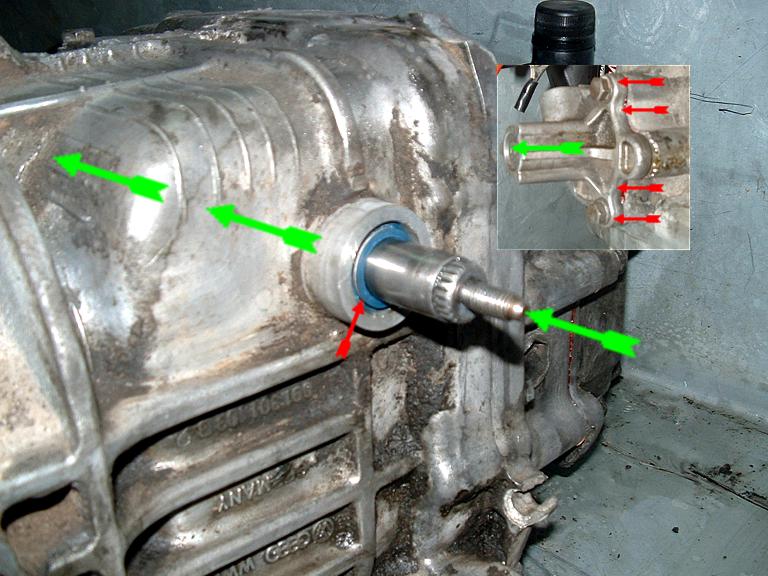
| La première chose est de descendre la transmission (juste assez) en dévissant la vis du support avant. (rouge). Désignation des flèches: Bleu pale: vis (17mm Allen, femelle) de remplissage d'huile, Vert: joint du bras de vitesse, Jaune: vis du bas du démarreur, Blanc: vis du haut droite qui retient le moteur a la transmission et en même temps le démarreur et celle du bas droite. / First thing is to lower the trany (just enough) at the front mount (red arrow). Arrows designation: Light blue: Oil filling/check plug (17mm Allen, female), Green: shift lever ball joint, Yellow: Lower starter screw, White: right upper engine to trany screw that also hold the starter and the lower right screw engine to trany. | Les flèches rouge indique la ou supporter le moteur a l'aide d'une chaîne au autre! Les flèches blanches indique toutes les vis/joint/attache a enlever. / The red arrows show where the engine should be suported, we use a chain! The Whites arrows show all location where a bolt/joint/attach point shout be remove, detach or unscrew. | Les flèches blanches de gauches montrent la distance de détachement approximative, Jaunes: les deux vis du haut et bas gauche de transmission/moteur. Rouge: position (enlevé sur l'image) du cylindre "slave" d'embrayage. Blanc a droite: les vis Allen ou Torks (12 points) des cardans, ceux ci sont a dévisser en premier. / The left white arrows show the approx. lowering distance between the front trany mount and the trany. Yellow: the 2 left engine to trany bolt. Red: position of the clutch slave cylinder (removed in the picture). White (right of picture): Allen bolts or Torks (12 points) bolt of the inner drive axles, those should be remove before lowering the trany. | Le câble de contrôle de la pédale des gaz, normalement, celui ci est retenu par une C-clip. / The gas pedal cable, remoce the C-clip and pull this one out. | Bien entendu, nous utilisons un "lift" auto et un support de transmission, donc la seule chose a faire est d'attacher la transmission a sont support. il nous suffit de pousser la transmission vers l'avant. Sans l'utilisation de cette outillage, ca prend juste plus de bras, de la bières, pizza et quelques levier de plancher. / Of course, we are using a car lift and a trany lift, in that case, all we have to do is slowly push and lower the trany toward the front of the van. If you are doing this job on the ground, you need more hands, more friends, some beer and pizza.. and few car jack. |
 |
 |
 |
 |
 |
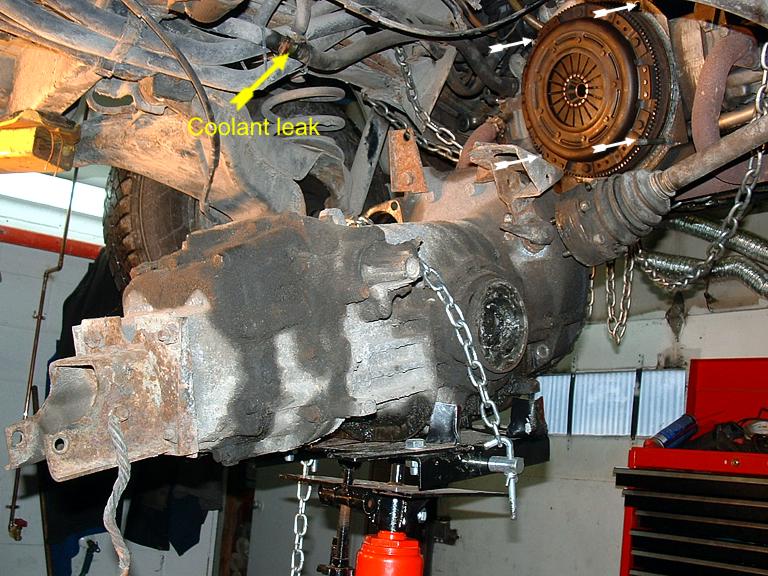
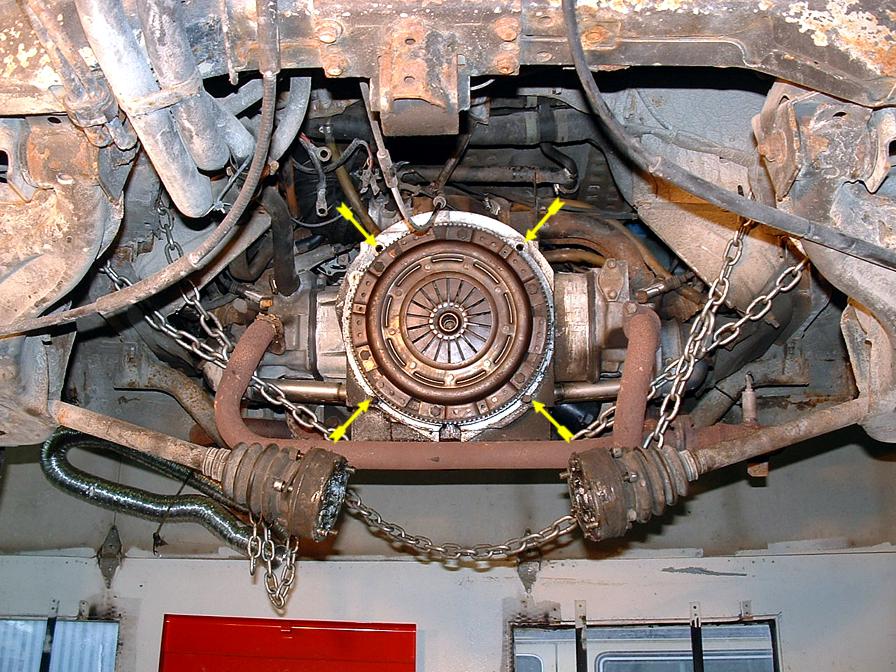
| Les flèches blanches montrent les 4 point d'attache (17mm) de la transmission au moteur. Il faut pousser la transmission vers l'avant juste assez pour libérer la tige de connections principale de l'embrayage. / The white arrows show the 4 attach /holding point of the trany to engine (17mm). Simply push th trany foward until the main trany shaft clears the clutch basket. | Une vue d'ensemble de la situation lors la baise de la transmission. / A good general view of the lowering of the trany. | Une vue d'ensemble de la situation lors la baise de la transmission. / A good general view of the lowering of the trany. | J'aime bien cette vue, on dirais que le moteur vas tomber dans le vide.... même sans chaîne, le moteur tient la par le support arrière / I like this view, seem like the engine is gonna fall... even without the chain, the engine won't fall, the rear engine mount is strong enough to hold the engine by itself. | Je me demande bien ce que le produit blanc est??? j'ai du nettoyer tout ca... / I wonder what that hard white stuff is??? i had to clean that mess. |
| Re scellage / Re sealing... | ||||
 |
 |
 |
 |
 |
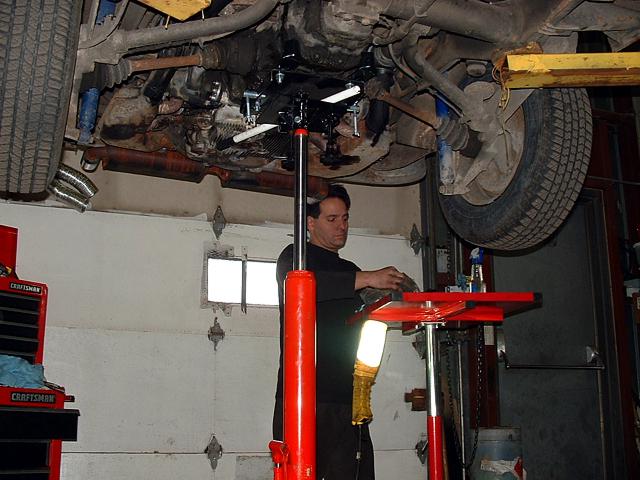
| Oui, après un an de travaux forcé, un "lift" est le bienvenu / Yeap, after 1 year, we finnaly got a lift..... nothing to do with the tranny section...but still! | Voila
l'outil... Here is THE tool |
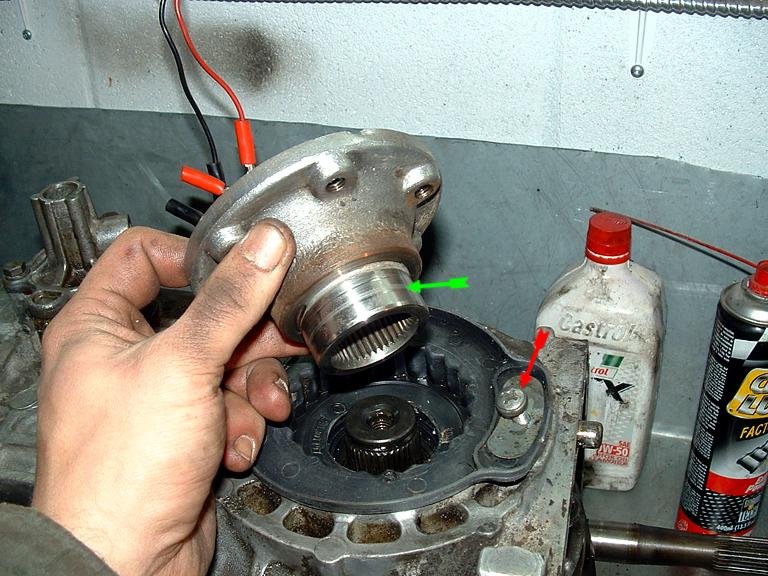
?, ho yea! le rafraîchissement de mon système de chauffage... de Home Depot... aucun rapport avec la section.... je joue avec mon lift... / ?, ho yea! my new heating system from Home Depot, he he he.... | Ok, enlevage du "bell housing", la ou est localisé l'embrayage, en rouge, les 10 vis qui le retienne. En vert, le fameux seal/shaft qui coule toujours... / Ok, removing of the trany bell housing, 10 screws (in red), this is where the clutch is located. In green, the dreaded leaking main shaft seal and bushing | La partie avant de la transmission (a l'opposé du Bell Housing), 8 vis. En vert, le "shaft" du reculons... et en paquet de gear... he he he / The front end of the trany... where the reverse gear system is located, 8 screws to remove this one... nothing special there....NOT |
 |
 |
 |
 |
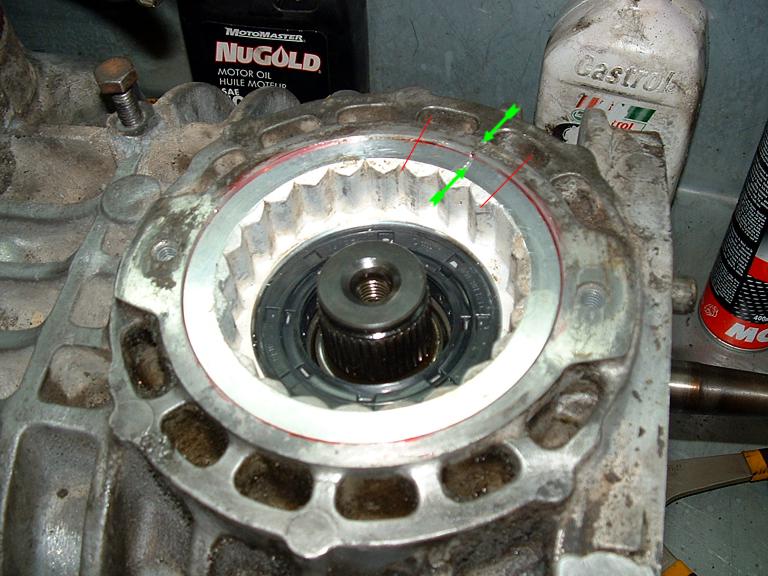 |
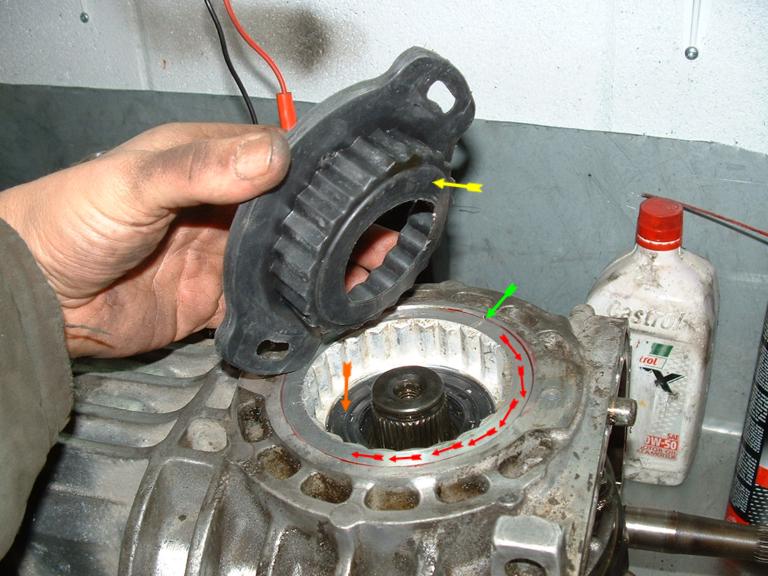
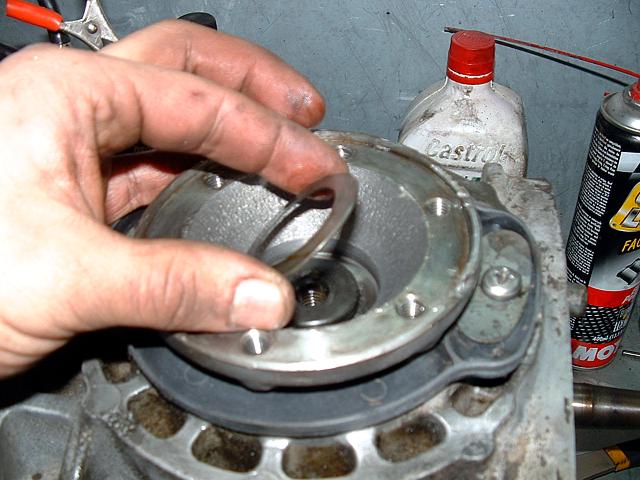
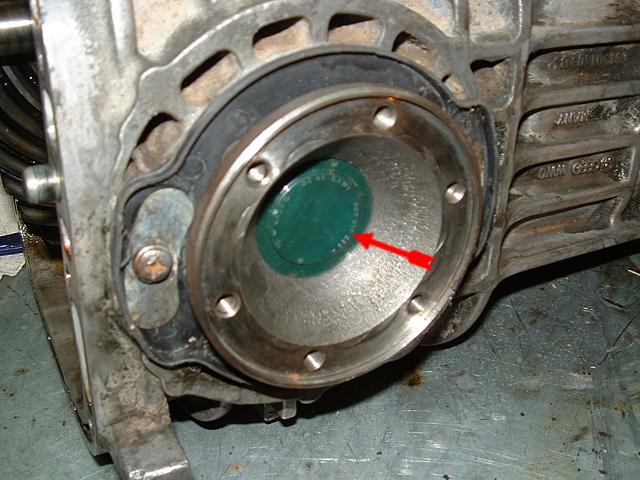
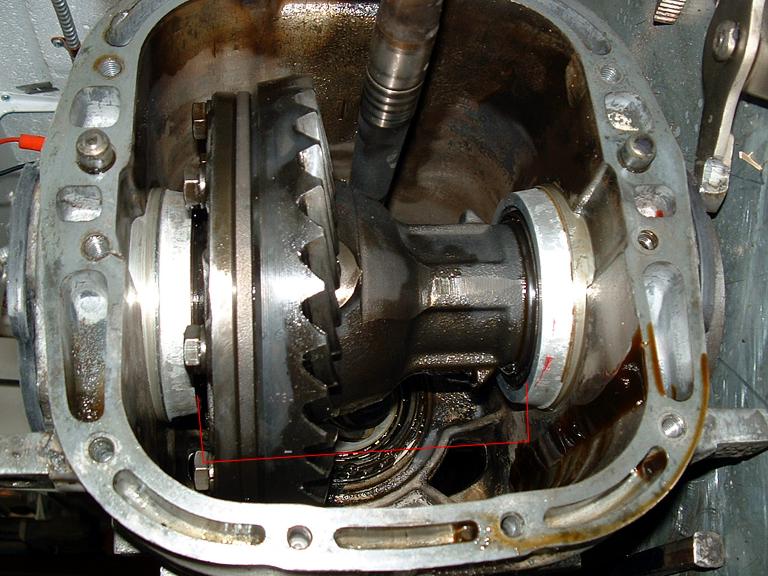
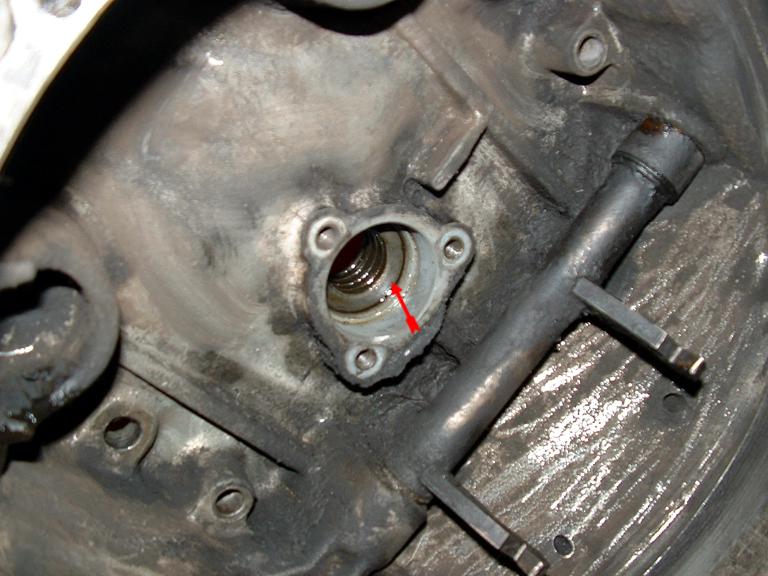
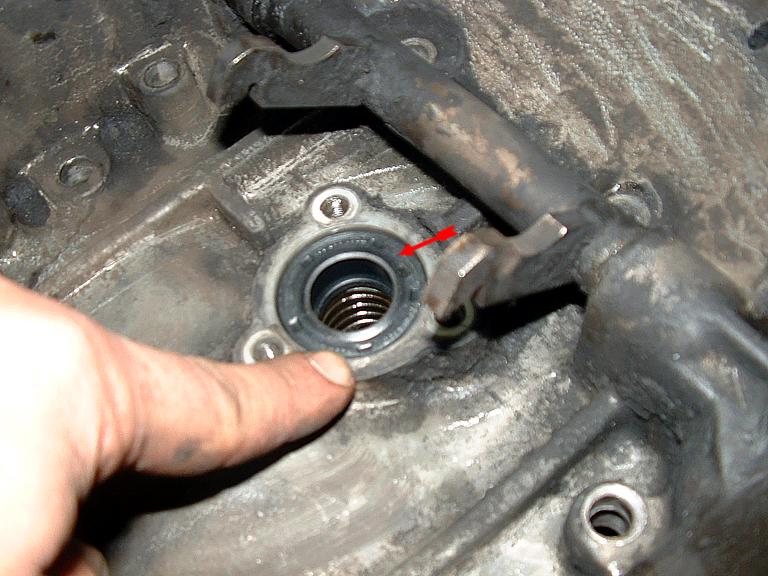
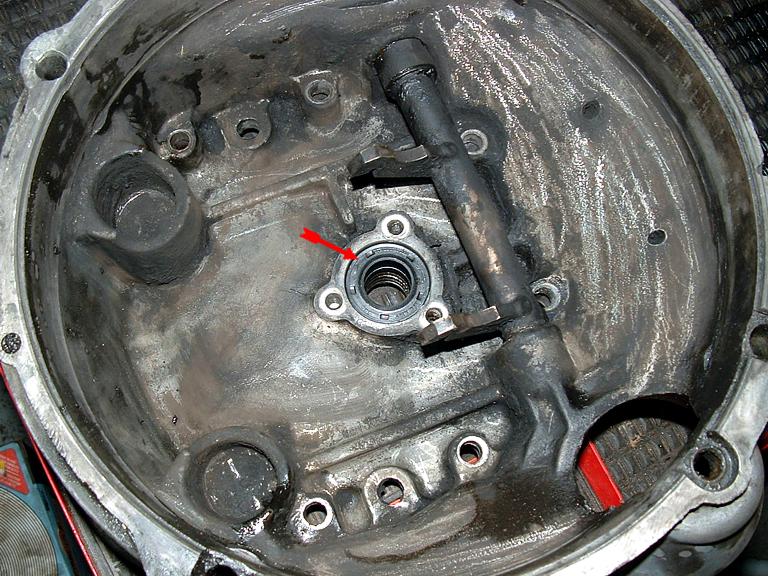
| Oupsss (re-montage, faire l'inverse au démontage...), il manque quelques photos du démontage.... he he he, bon, disons qu'on dévisse pour enlever la bague du "bearing" (avec un outil a 200$ ou avec un tournevis et un marteau...)... / Oupsss, missing some pictures of the disassembling portion of the job... anyway, just do the reverse job for it! unscrew to remove the bearing race, opposite for putting everything back together... make sure to mark the case and bearing race... (see other images) | Jaune, le fameux seal de différentiel / cardans qui coule toujours, entré a pression dans la bague. En bleu, la position pour insérer l'outil qui sert a dévisser/visser la bague. Enfoncer le nouveau seal jusqu'au fond. / Yellow is the axel/diff. seal, the dreaded one that leak everywhere, in blue is where you should pry to unscrew/screw the bearing race, improvise... make a tool.. or buy the VW one, he he he. | Vue du "bearing" et le la bague (meme que celle qui contient le seal) qui contient la partie extérieure du bearing concave... / View of the bearing, bearing race (also the one that contain the seal) that contain the outter bearing part. | Vue du protecteur de poussière et saleté. En rouge, la rotation pour visser la cage/bague, attention a la marque de départ / ajustement initial (en vert) / View of the dust cover (yellow), In red, rotation of the race to put this on in, be careful to screw this one in enough, that is why i made a mark before removing this one (in green).... | Si le différentiel a du jeu, serrer la bague un peu plus, vous allez le senti quand c'est assez, n'ayez pas peur. / If the Diff. is to loose, screw this one a bit more, you will feel it when it's enough, don't worry. |
 |
 |
 |
 |
 |
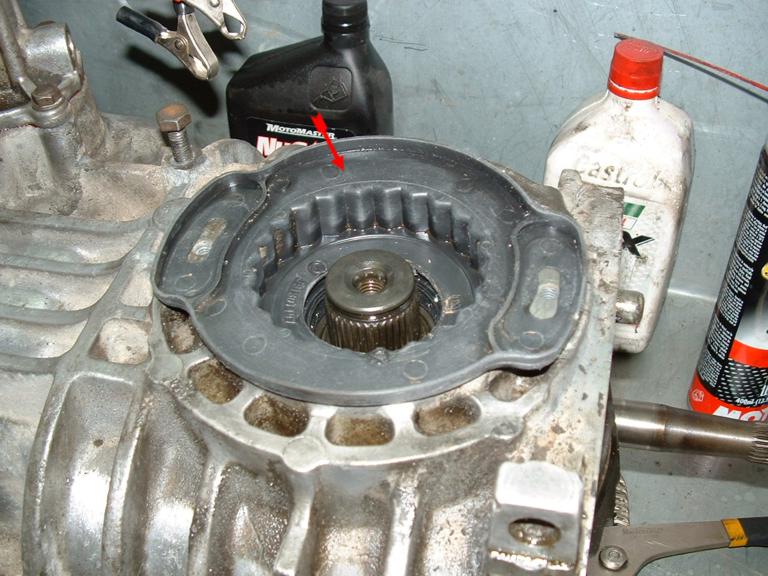
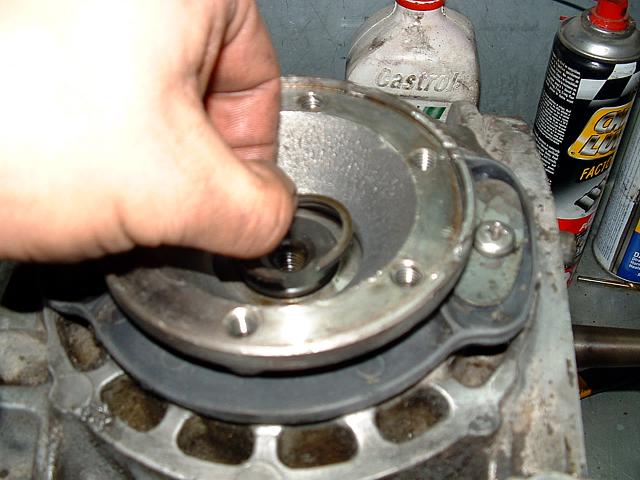
| Le protecteur en place. / The dust protector in place | Graisser la pièces / Grease the part | Mette l'anneau en place, soyez sure qu'il est du bon sens / Put the washer back, make sure it is in the right position | C-Ring en place, pas facile celui la... beaucoup de pression! / C-Ring in place. this one is NOT easy, a lot of pressure... | Vérifier le tout, pousser bien sur le C-Ring et fesser en sorte qu'il soit bien en place / Check everything, carefully push the C-Ring IN the slot. |
 |
 |
 |
 |
 |
| Cap en place / Cap in position | Vue générale du différentiel / General view of the diff. | Vue du "bushing (et NON du bearing) qui enligne le "shaft" de transmission, celui-ci est remplacable au besoin. Un certain jeu est acceptable, mais pas trop! / View the the transmission main shaft, this one can be replace if needed. A certain "play" is acceptable, but NOT to much. | L'emplacement du "Seal" du shaft principale (le plus gros problème de fuite d'huile de transmission des VW dans le secteur de l'embrayage) dans le "Bell Housing", enlever au paravent. Pousser le nouveau en place. / Location of the main shaft seal (main cause of trany leaks in the DRY clutch section) in the bell housing, this one was remove before. Push the new one in place. | Voila!!! |
 |
 |
 |
||
| Voila part 2... | Coté gauche, l'emplacement du déclencheur / interrupteur des lumières de reculons, celui ci est a l'opposé de la tige de levier de sélection des vitesse (voir la prochaine image), il faut enlever celui ci pour retirer le "shaft" affin de changer le "seal" du levier. / Left side, here is the location of the gear selector shaft, the left side is the backup light switch section, this as to be remove so the shaft can go out to change the seal of the gear selector shaft at the other end (see next picture) | Voila en bleu le fameux "Seal" du sélecteur, en vert, il faut pousser la tige a l'intérieur affin de pouvoir enlever le vieux "Seal" / In blue is the gear selector seal, you need to push the gear selector shaft IN to remove this one, at the same time, seal the backup section of the selector shaft at the other end (backup switch housing) | Conduisez
prudemment! (Bientôt, la reconstruction complète d'une transmission manuel 4 vitesse... engrenages, synchros, roulements a billes...)
|