| The Vanagon head gaskets | ||
| Note:My friend Steve from Boston is nowhere to be
found (all I know for now is that he moved), so all my heads removing and
gasket replacement pictures are gone (for now!!!) with the negative (same
envelope). Most of my text is ready. If some of you guys have good
pictures (digital or standard) of the procedure (step by step) I would
use those for my site. Anything you got would do the job for now (with many pictures I
should probably be able to do something acceptable). Could you send those to me, I
will give full credit to the author of course. I think the heads
gasket problem is bugging a lot of people and I would like to do
something on the subject.
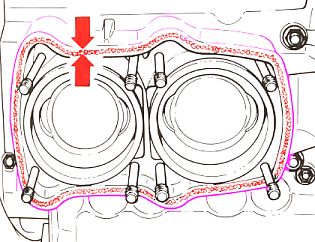
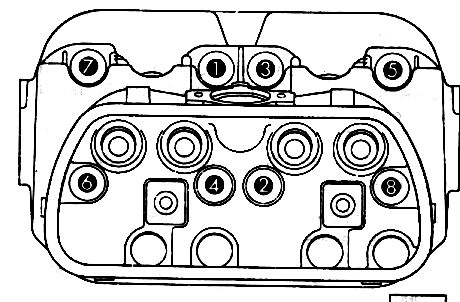
About the Vanagon head gasket design: It’s poor!! It shows clearly that VW only added a water jacket to an already existing design. The hollow part between the sleeve and the water jacket (near head) should have been filled resulting in a flat mating surface with the head. With this kind of design a flat gasket could have been use. The removable sleeve system could have been kept but more difficult to remove. So remember that with the existing design the importance of the torque sequence is crucial. The following are a few modified pictures of the Bentley for those that don't have this useful book. |
||
|
||
 |
||
 |
||
|
||
 |
||
| There is much speculation about applying sealant on the head side of the main gasket. Logically it should not need any sealant on either side! That the purpose of having a flexible rubber gasket! Whatever, VW and many good VW mechanics suggest the use of a sealant and that is only to extent the life of the gasket. The sealant quality and company should carefully be chosen. Many sealants won’t react properly with rubber on a long run. And last but not the less, USE OEM GASKET. In my experience nothing come close to OEM product when talking about gasket. (Green arrow) | ||
|
||
|
For a full precedure on removing the heads, click here ( www.vanagon.com ) |