|
Adding a fridge-fan
(12V/110V)
to the Dometic 182 whitout removing the
fridge
(click on a picture for a bigger view) |
| |
|
First lets see why: All fridge have a fan, simply because it help getting the cool
air circulating everywhere, especially to the bottom part of this one.
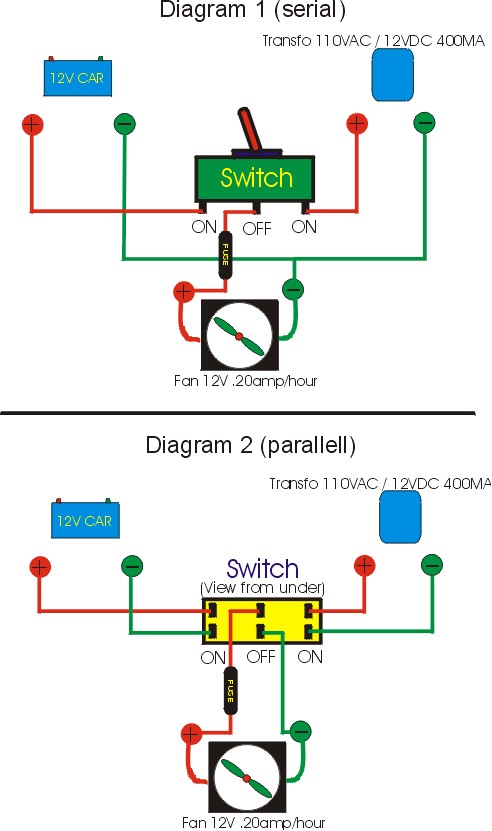
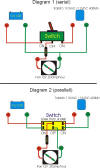
What we need for a 12V and 110V operation:
Click here
to see the possible wiring
diagrams
The fan (C):
You can spend hours finding the right fan, I did.
Here is what you are looking for in a fan:
- Size (no more than 2 3/8 in): The fridge is small
so no need for a bigger fan. A smaller one doesn’t have enough air flow
for all that trouble.
- Current consumption: Stay bellow .30amp (300mah),
yes I know, even a 750mah would last for a day or 2 before draining the
battery but why have more. No need.
- The airflow or RPM: get a 3000 to 4000 RPM
computer CPU fan. They have the best rpm/airflow/noise rate. The 9000 to
11000 are too noisy, the flow of those one is too strong for nothing.
- Noise: another good reason to stay with a 3000 to
4000RPM and .300mah. Most CPU fan are brushless fan and have ball bearing.
They will last forever (at least a few years) and cost nothing
(4.95CAD-2.75USD) at any electronic part store (don’t go to a computer
store, they will rip you right away.
|
|
Fan cover (E): A must, so your stuff and fingers
won’t get into the impeller and break this one.(.99$)
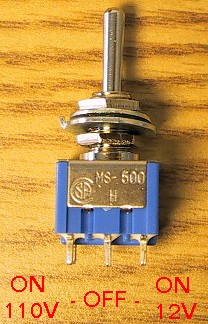
A switch (D): If you don’t want to use the fan in 110V
mode, simply buy a 2 position (ON/OFF) normal micro switch. If you want to
have a fan running on 110V you will need to buy a ON-OFF-ON switch that
hold the ON position, not a (ON)-OFF-(ON). Chose a good quality switch
with 6 connectors (see diagram).
A small power bar(B): You will need this one if
you use a 110VAC/12DC transformer / converter. This will be hooked to the
fridge existing location under the sink.
A 110VAC/12DC small transformer / converter(A):
This will have your fan working on 110V. Very cheap to buy at any
electronic parts dealer. Get at least 200mah more than the fan consumption.
I use a rechargeable wireless phone adaptor (110VAC / 12VDC 400mah).
|
Click on the picture above for a big size
view.

White shrink (F): To get that black fan wire in the
fridge a nice look.
Small
parts: Tie rap, solder, electric tape and so on. |
|
|
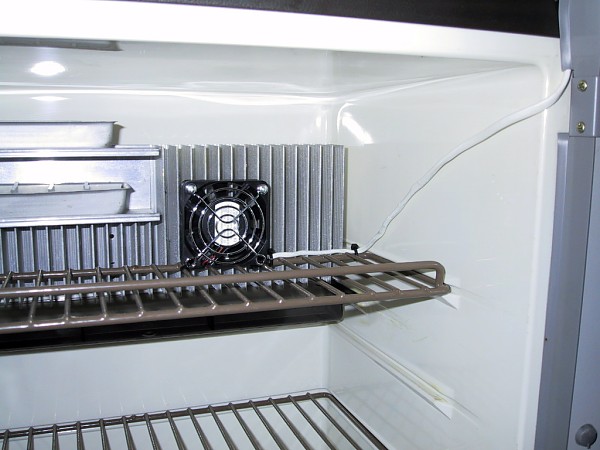
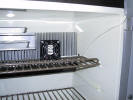
| Find a
suitable fan location. I chose to put mine upward close to the cooling
element, my first Idea was to put this one flat on the grill so she would
push air below but she was making to much noise due to resonance/oscillation.
The upright position gave me the lowest noise and I like the idea that the
fan takes cool air from the back and send it forward. |
 |
|
|
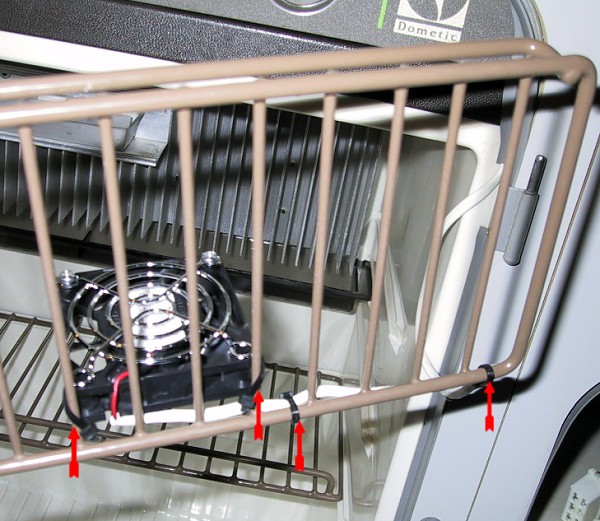
First,
get the fridge door, the fridge front plate/panel (3-right screws) and
the drawer out. Next, remove the upper fridge grill and fix the fan
with tie-rap to this one (see picture). Add a wire extension to the
fan and put the white shrink on it (about 2 feet). You will have to
drill (1/4) a small hole on the upper front part of the fridge door (When
remove, see picture). When done, replace the fridge front panel and
the door. |
 |
 |
|
|
|
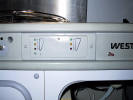
Remove
the font metal panel with the name “Westfalia” and the 12-volts fridge
control panel. 3-screws bellow and 2 screws on each side. Unplug the
12-volts fridge control panel, and remove the control panel from the
front metal part (2-screws). You will have to choose a location for
the switch, drill an appropriate hole for this one. Disassemble the
fridge control panel for later wiring.
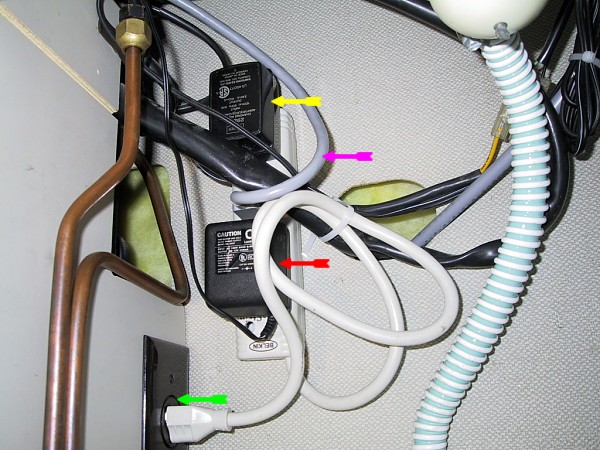
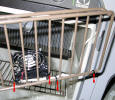
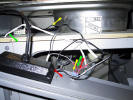
the fridge AC connection below the sink and add the power-bar on the
upper wall behind the drawer, plug the fridge and the new 110V adaptor
to this one. The upper adaptor (yellow arrow) is for my portable
vacuum cleaner. Red arrow is the new fan 110V adaptor and the grey
wire (pink arrow) is the fridge wire. Pass the new adaptor wire on the
left side of the sink between the 2 shelf. (see picture below) |
 |
|
|
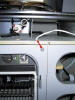
First
take a look at the wiring diagram so you can choose which kind of
layout you will choose (picture on the right). Take your 12VDC van source from the fridge control panel, follow the big red and black wire from
the big connector (see picture) that plug into the control panel. (I don’t remember
which color). You are now ready to begin your wiring. The 110V/12V
come from the adaptor; the 12VDC car voltage comes from the fridge
control panel (or elsewhere, your choice!).
- Yellow arrow: 110V/12VDC from the adaptor
- Red arrow: 12V source from the fridge control
panel.
- Green arrow: To the fan
Note: on the picture the wiring was not
finish. You can also see the location of the 110V/12V wire left of the
sink. On the left side you can see the big plug that attach to the
fridge control panel.
Note: You can
also add a warning 12V light (just to tell you that the fan is working)
in parallel with the fan; you just have to drill another hole beside
the switch.
|
 |
 |
|
|
| Final view (clean job): |
 |
|
|
Back |