| CV Joints servicing & mainttenance
(This
is an easy but messy job!!!, the total time for both side was
8 hours non stop)
More textual information can be found on
Tom Carrington
Web-site (i use some of is well written text on this subject, tom did
a very good job, i just have better pictures than him,
he he he...)
Note: You can click on most pictures
for a larger view
Special parts & Supplies Needed:
- 6 & 7mm allen head wrench or "triple-square" tool (depending on the year
of your van), socket version preferred
- CV Joint grease (Approx 4oz per joint)
- CV Joint boots
- Plenty of rags or paper towels
- Old clothing
|
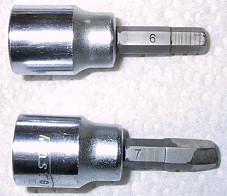 |
Have an 6 mm Allen socket
and a 7 mm Allen, sand or shave the end of the 7mm to get this one to
6.5mm (to get 6.5 at one end and 7 at the
other end, see left picture). Why! in case some of the 6mm bolts are striped along the way!!!!!!
If so, force the 7mm with a hammer into the Allen bolt. Remember to
clean each Allen bolt hole with a pick before. |
|
|
Another solution by
Edward Nutter for the shave 7mmAllen:
An easier solution is a 1/4" allen head. It's just .014" (.35mm) larger
than 6mm and is a convenient off the (U.S.) shelf solution for the same
problem. |
|
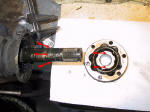
Step 1: Removing the
axle shaft
On VW Vanagons, they are bolted to a flange protruding
from the transmission on one end, and to a similar flange on the back of the
wheel hub on the other. The bolts (6 per joint) will either be
a 6-point allen head or 12-point "triple-square" design cap head bolt.
(on most car you need to remove the spindle or wheel assembly / ball joint
to get the axle out, it's much faster and easier on a Vanagon) |
| 1A-
Remove the outside 6 Allen screws first, if one screw is really stuck,
you can stop the job and screw the other bolt back. The inner joint
Allen bolts can be remove with a vice grip if stuck, not the outer
one. |
 |
1B-
Remove the inner screws. When all scews are remove, if the axle
is stuck, smoothly tap the shaft. Mark each joint (inner & outer)
with a pen or tap some letters with a punch & hammer for further
reference. Whip off the old grease. |

 |
|
|
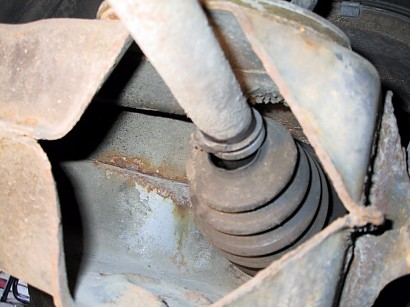
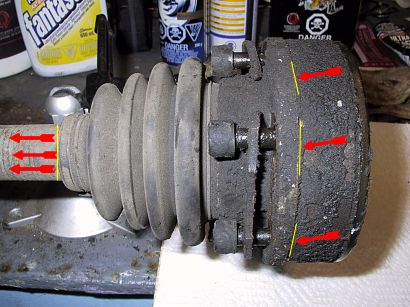
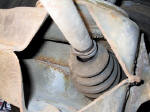
| Step 2:Remove the boot
& mark all parts (Now that the joint is
out, place the driveshaft in a vise, or use a C-clamp to secure it to your
workbench) |
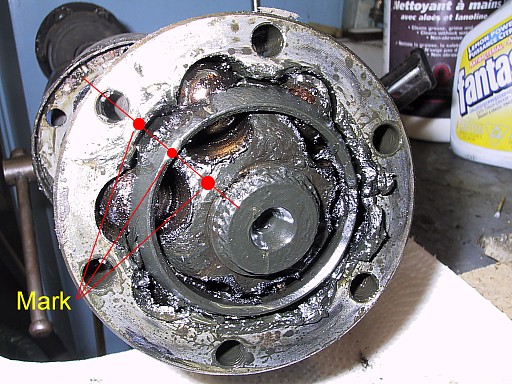
| 2A-Before
you remove the boot, carefully mark
the outer side of the 3 main joint
parts for further reassembling. What i did is I barely touch each outer part (side
of the trany of the inner joint). with a Dremel cutting wheel. |
 |
2B-
Remove the boot with a big flat screwdriver and a hammer. Slide
the boot toward the midle of the shaft a few inches. |
 |
|
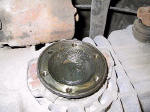
| Note:
rotate the joint (outer race) clockwise and counter clockwise and look for
any play (loose) |
|
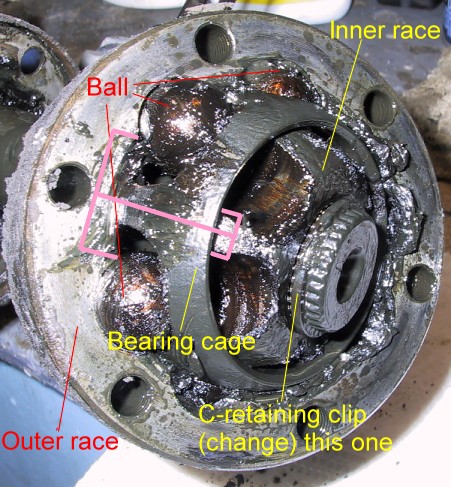
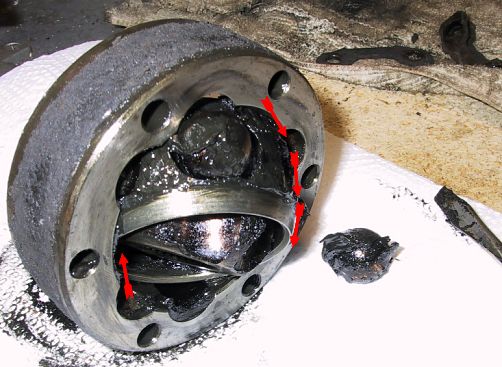
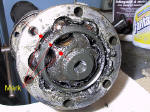
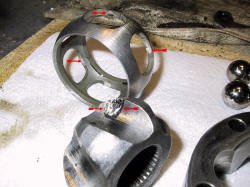
| Step 3: Remove the
joint from the shaft |
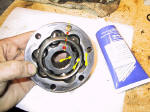
| 3A-Remove the C-retaining clip
that secure the joint on the shaft. Here you can see all
the internal component. Take note of the pink section, the
small inner
race portion is align with the outer race big section. This is
very
important, the opposite will work when reassembling but you will
break
the joint that way. |
 |
3B- If the joint appears to be stuck on the shaft,
use a long
punch and a hammer against the inner race to drive the entire joint
off. Do not, at any time, use a hammer on the splined shaft or the
outer race! |
 |
|
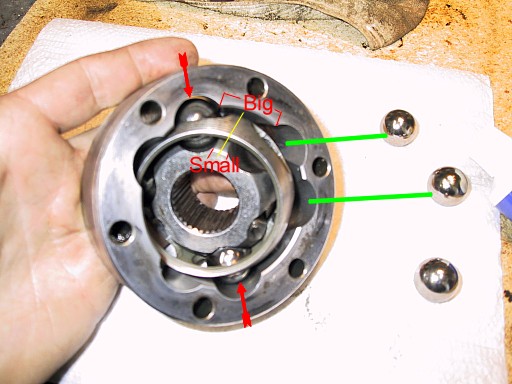
| Note from Tom: Here's the
really important part - Notice how the
grooves for the ball bearings in the outer race are not equally spaced.
The inner race also has large and small spaces between the ball bearing
grooves. To assemble the joint correctly, make sure to
align the thin spaces of the inner race with the wide spaces of the outer
race. Be careful - You can do this wrong! In fact, the joint goes together
easier when you are doing it the wrong way. If you assemble it the wrong
way, the joint will bind when it tries to flex. |
|
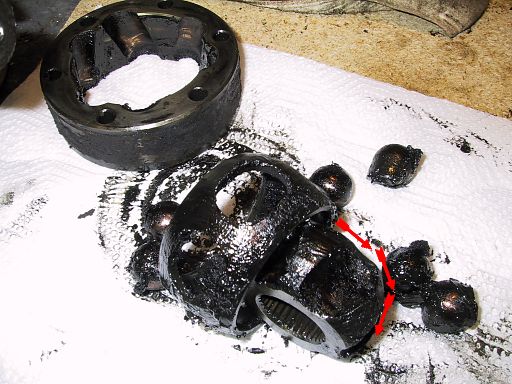
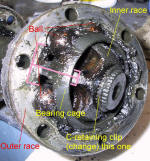
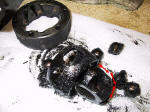
| Step 4: Disassembly
and cleaning of the CV Joint: (have fun...) |
| 4A-
rotate the inner race 90° and the bearing cage at 45° and pull those 2 out, the
6 balls should easily come out of the cage. |
 |
4B-
After removing each ball from the bearing cage, rotate at 90°
the inner race from the bearing cage and remove this one. Clean
everything!!!! good luck!!! (i use engine cleaner and brake cleaner to
remove all oil residue.) |
 |
|
|
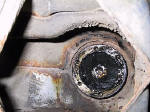
| Step 5: inspection of the joint parts |
Ok, now it’s the time to decide if you replace the
velocity joint or not. Here is few reasons that the joint should be
replace:
- Excessive play (loose) on the first check before
disassembling (see above in red)
- “All” ball position on the outer race or inner
race are pitted or heavily damage
- Broken parts
- Fissured parts
- When moving the joint, you feel or hear strange
stuff
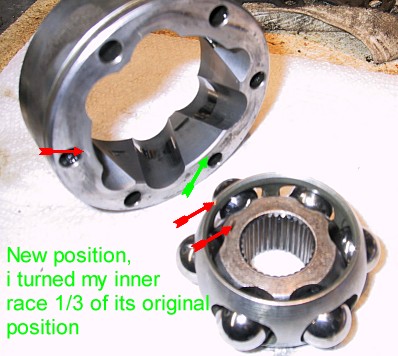
Mine
was pitted only at one place (see picture), so what I did is to rotate
the inner race to 1/3 of its original position and of course change
all balls original position. That should give me another year or two
of operation with those. Remember that I didn’t have any loose or play,
I think that the pitted area was cause by dirt particle. Another good
reason to change the grease. |
Note: the small mark on
the bearing cage are quite normal
 |
|
|
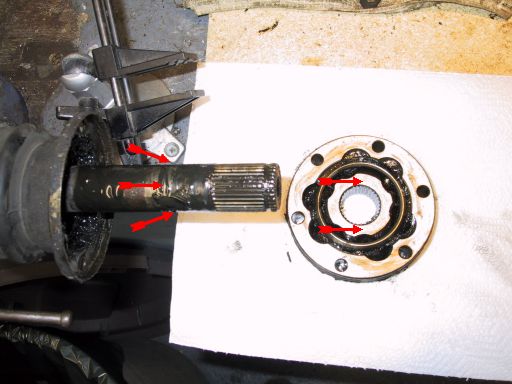
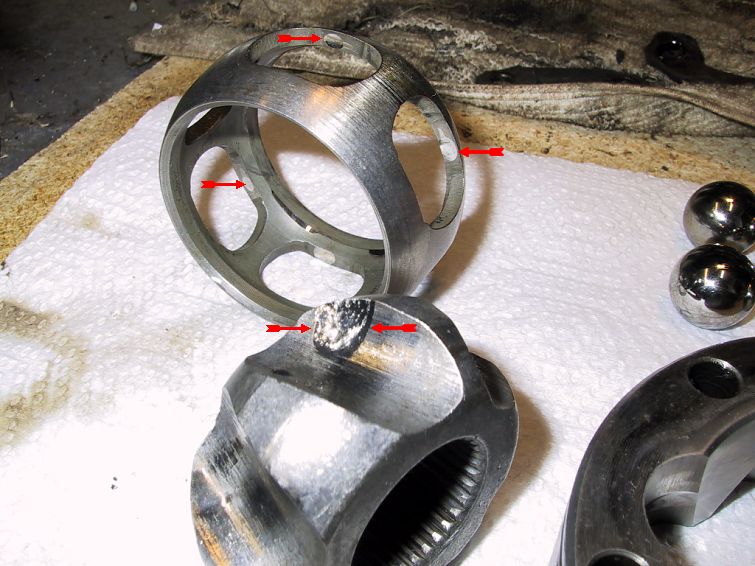
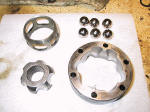
| Step 6: Assembly of
the CV Joint |
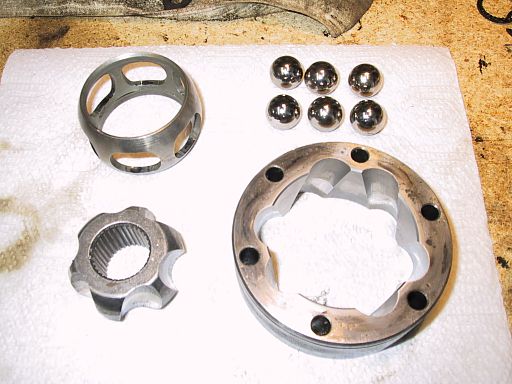
| 6A-
The cleaned parts. Make sure that
all the "marks" you did on step 2 are on the
same side |
 |
6B-
Insert the inner race into the bearing cage the same way you did
remove this one on step 4. Insert all balls (if your good) or only 2
ball on opposite side. Check if parts are on
the right side and have the right alignment. |
 |
| 6C-
It is easier to insert 2 opposite ball first (red arrow) and twist the
inner race to insert all remaining ball one by one.
Check if
parts are on the right side and have the right alignment. |
 |
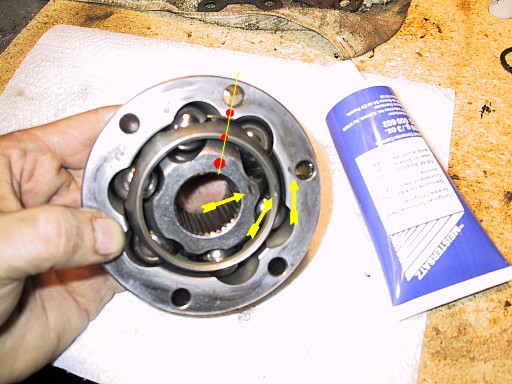
6D-
All parts are back together. You can see the original marks (yellow
arrow - just for the picture). Put some grease to hold everything if
you are alone. (but i prefer to wait until i am sure that everything
is OK before i put the grease). |
 |
|
|
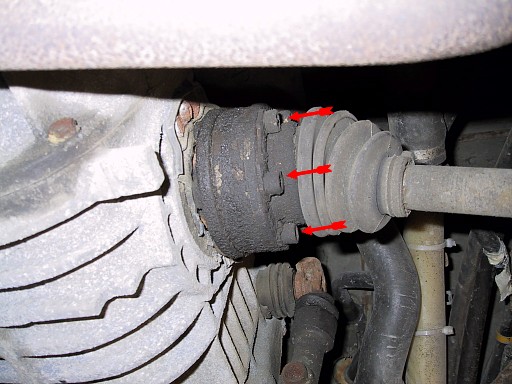
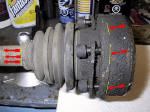
| Step 7:
Reinstalling the CV Joints on the shaft |
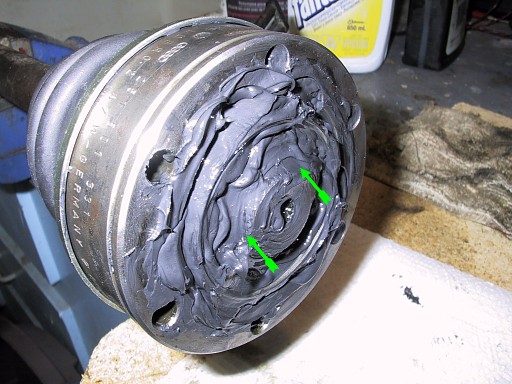
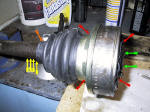
7A-
- Insert the new boot first (put some
grease, it help).
- Insert the CV-joint (check
side!!!!). If he is hard to go in, tap on the inner race
(green arrow).
- Put the NEW C-clip on the shaft to
hold the CV-joint in place.
- Grease the CV joint outside and
inside by pushing the grease firmly into each ball. Use all
remaining grease inside.
|
 |
6B-
WARNING, the new boot act like a spring,
the boot distance should be adjusted equally each side of the axle so
the shaft as proper play each side and the CV-Joint is working on is
center axe. Put a tie-rap (orange arrow) Grease (red arrow) C-Clip
(Green arrow) |
 |
|
|
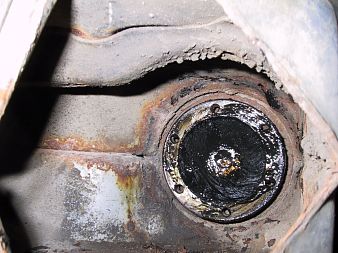
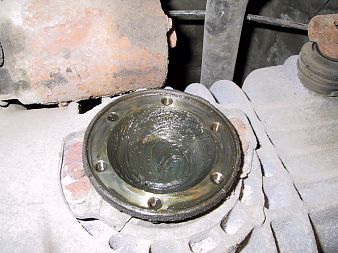
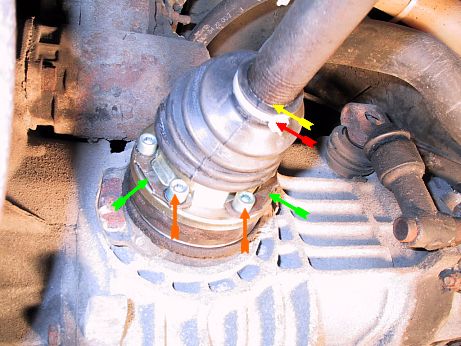
| Step 8: Reinstalling
the axle Note: Some people
suggest swaping/side the 2 axle, click here
to see a picture |
|
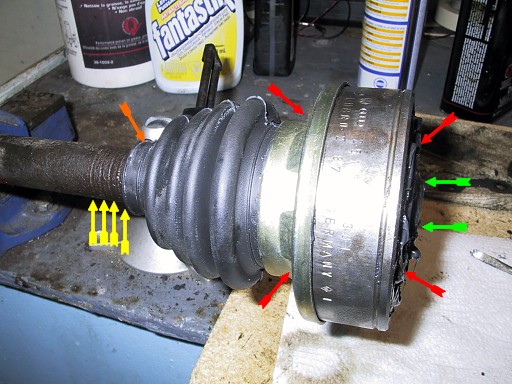
Install
the drive shaft. Make sure it is well seated on the mating surface.
Reinforced plates (Green arrow), New bolts, check torque (orange arrow).
Tie-rap (Red arrow) Distance (Yellow arrow) |
 |
|
| Hope that will help a few of you guys!
Many thanks to
Tom Carrington for
is web site info and is permission to use some of is very well written
text. |
|
Back |